

What we are going to learn
- How to create a ROS 2 package
- How to load a URDF robot for the Gazebo simulator
List of resources used in this post
- Use the rosject: https://app.theconstructsim.com/l/50fbfe47/
- The Construct: https://app.theconstructsim.com/
- Nav2 documentation: https://navigation.ros.org/setup_guides/index.html
- ROS2 Courses –▸
- ROS2 Basics in 5 Days (Python): https://app.theconstructsim.com/#/Course/73
- ROS2 Basics in 5 Days (C++): https://app.theconstructsim.com/#/Course/61
- ROS2 Navigation (Galactic): https://app.theconstructsim.com/Course/109
- ROS2 Navigation training: https://www.theconstruct.ai/ros2-navigation-training/
Overview
This post answers the following question posted at ROS answers:
ROS Inside!
ROS inside
Before anything else, in case you want to use the logo above on your own robot or computer, feel free to download it for free and attach it to your robot. It is really free. Find it in the link below:
Opening the rosject
In order to follow this tutorial, we need to have ROS2 installed in our system, and ideally a ros2_ws (ROS2 Workspace). To make your life easier, we already prepared a rosject with a simulation for that: https://app.theconstructsim.com/l/50fbfe47/.
You can download the rosject on your own computer if you want to work locally, but just by copying the rosject (clicking the link), you will have a setup already prepared for you.
After the rosject has been successfully copied to your own area, you should see a Run button. Just click that button to launch the rosject (below you have a rosject example).

Learn ROS2 Topics vs Service vs Action – Run rosject (example of the RUN button)
After pressing the Run button, you should have the rosject loaded. Now, let’s head to the next section to get some real practice.
Opening the Code Editor
Now that the rosject is open, let’s open the Code Editor by clicking on the second link:
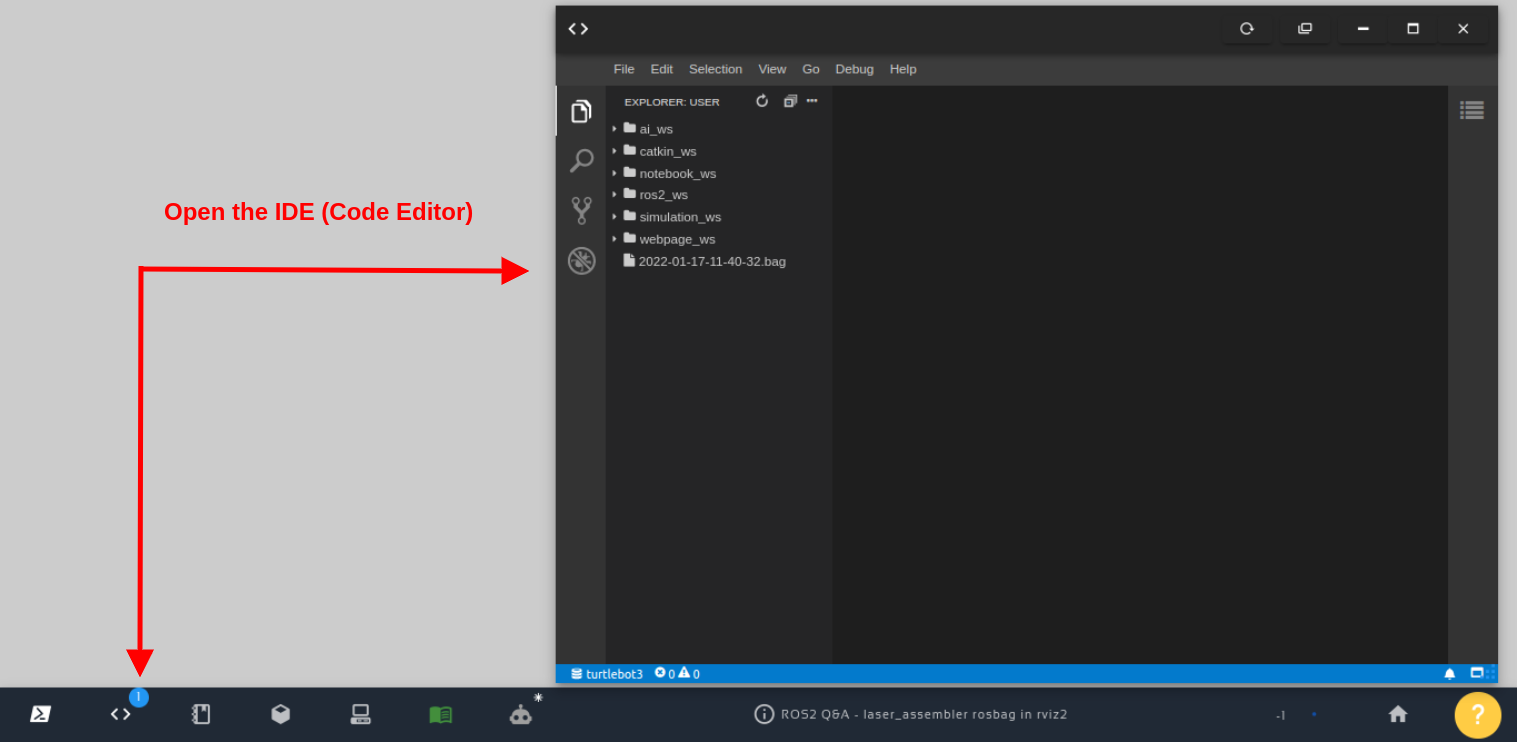
Open the IDE – Code Editor
Once the Code Editor is open, you should be able to see that we have a ros2_ws folder (ROS2 workspace)
The sam_bot_description.urdf file
Now that you have the Code Editor open, let’s have a look at the file that contains the robot description. The file is inside the ros2_ws folder. The full path is:
/home/user/ros2_ws/src/sam_bot_description/src/description/sam_bot_description.urdf
In case you want to see the content using the terminal, you can open it by clicking the Open a new terminal button.
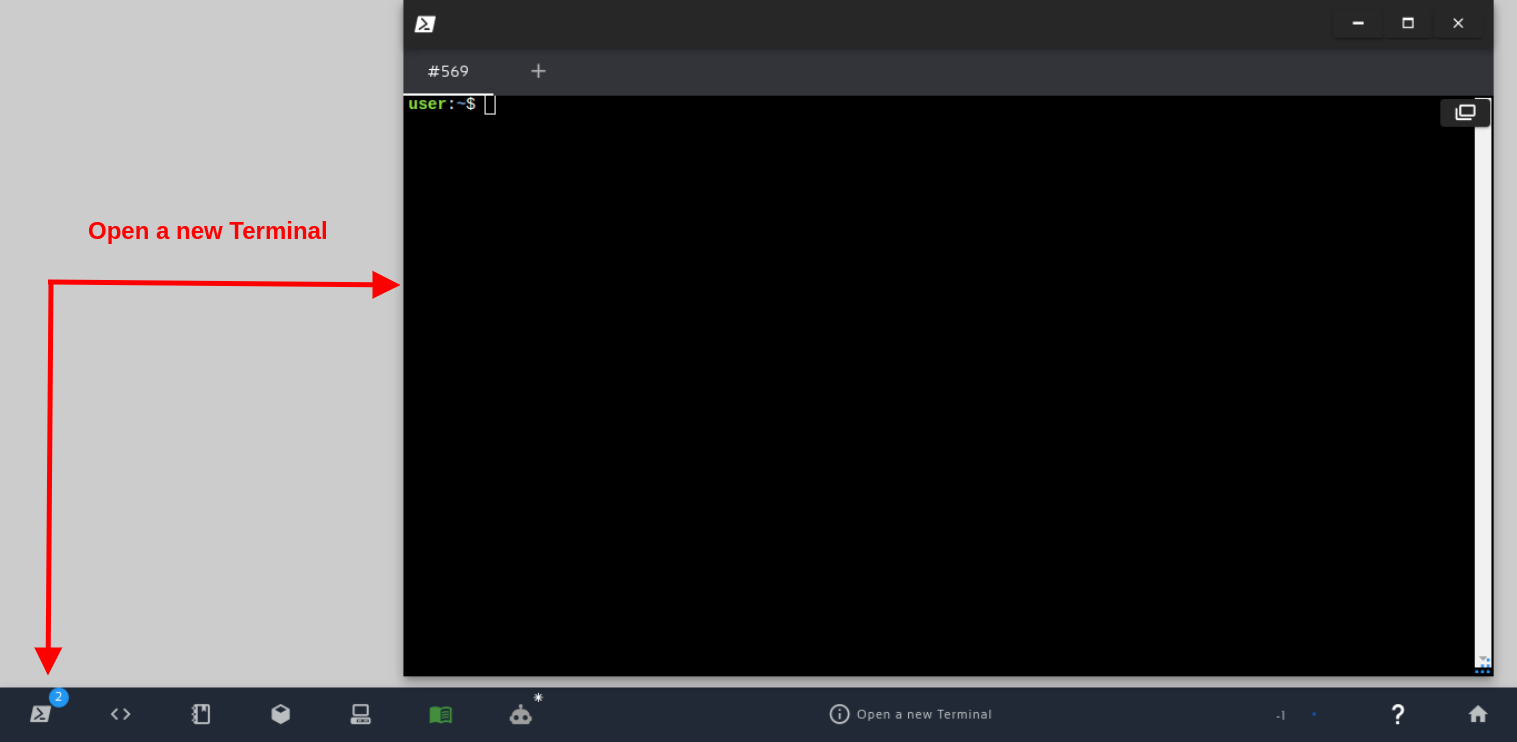
Open a new Terminal
Once inside the terminal, just type the command below (although it is better to see the file using the Code Editor):
cat /home/user/ros2_ws/src/sam_bot_description/src/description/sam_bot_description.urdf
Starting the simulation
As we saw in the overview, the question asked in ROS Answers was saying that the robot wheels were not working. That happened probably because the person forgot to add something to the URDF file.
To better understand the URDF file, you can refer to the Nav 2 Documentation: https://navigation.ros.org/setup_guides/urdf/setup_urdf.html and https://navigation.ros.org/setup_guides/odom/setup_odom.html
Now, go to the terminal you have open and run the following command to run the simulation:
ros2 launch sam_bot_description display.launch.py
If everything went well, you should have Gazebo as well as RViz open, like in the image below (If the Graphical Tools don’t open automatically, just click click the 4th and 5th buttons on the bottom left bar to Open Gazebo and Open the Graphical Tools):
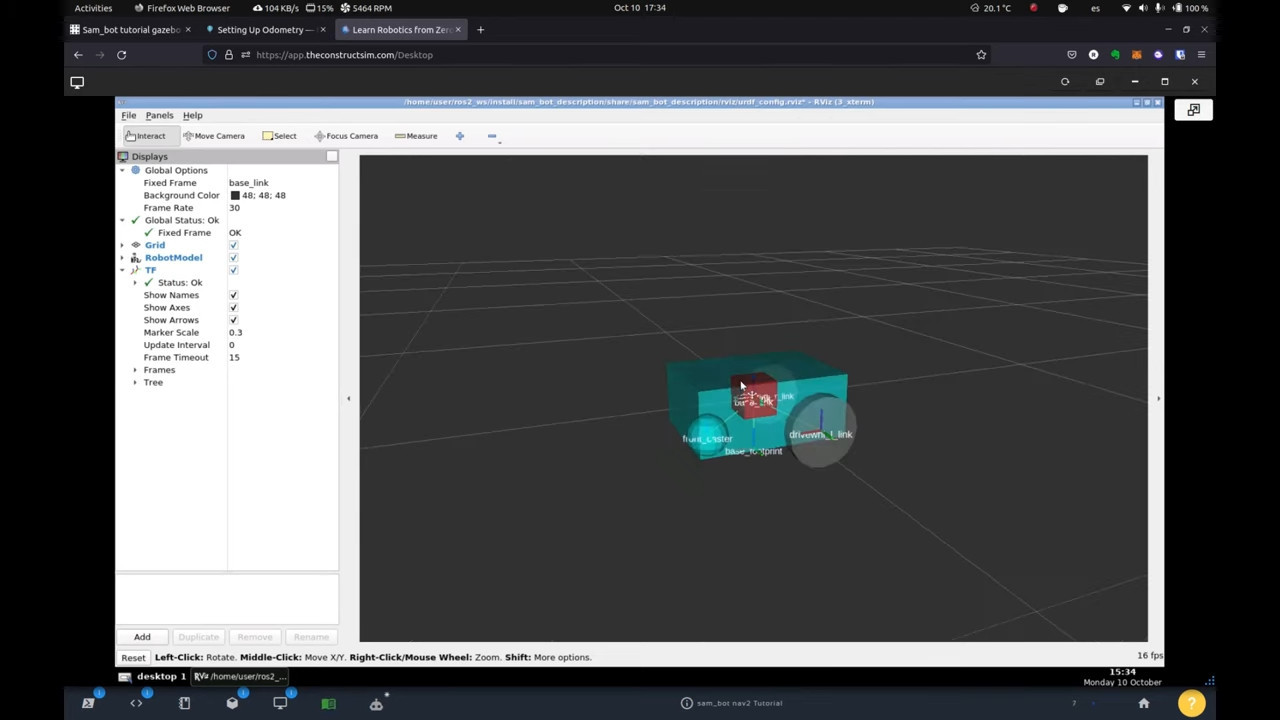
You can also see the Gazebo simulation by clicking the 4th icon named Open Gazebo. There you will see that the wheels are in place.
Well, that is pretty much it.
We hope this post was really helpful to you. If you want a live version of this post with more details, please check the video in the next section.
Youtube video
So this is the post for today. Remember that we have the live version of this post on YouTube. If you liked the content, please consider subscribing to our youtube channel. We are publishing new content ~every day.
Keep pushing your ROS Learning.
Related Courses & Training
If you want to learn more about ROS and ROS2, we recommend the following courses:
- ROS2 Basics in 5 Days (Python): https://app.theconstructsim.com/#/Course/73
- ROS2 Basics in 5 Days (C++): https://app.theconstructsim.com/#/Course/61
- ROS2 Navigation (Galactic): https://app.theconstructsim.com/Course/109
- ROS2 Navigation training: https://www.theconstruct.ai/ros2-navigation-training/


0 Comments