

What we are going to learn
- How to record your own rosbag
- How to use laser_assembler package
- How to visualize results from ROS2
List of resources used in this post
- Use the rosject: https://app.theconstructsim.com/#/l/4733ef97/
- ROS Development Studio (ROSDS) —▸ http://rosds.online
- Robot Ignite Academy –▸ https://www.robotigniteacademy.com
- [ROS Q&A] 047 – How to use the laser_assembler package: https://www.youtube.com/watch?v=MyA0as18Wkk
- ROS2 Tutorials –▸
- ROS2 Basics in 5 Days (C++): https://app.theconstructsim.com/#/Course/61
- ROS2 Navigation: https://app.theconstructsim.com/#/Course/50
- Get ROS2 Industrial Ready 3-Day Online Workshop
- The question that this post answers: https://answers.ros.org/question/393958/unable-to-visualize-point-cloud-in-rviz-using-rosbag-in-ros2/
Creating a rosject
In order to learn how to see data coming from ROSBags in ros2 depth camera data, we need to have ROS installed. We already prepared a rosject ready for that: https://app.theconstructsim.com/#/l/4733ef97/. You can download the rosject on your own computer if you prefer to work locally.
If you want to create your own rosject instead of using the link we just provided, you can do it also. We are going to use The Construct (https://www.theconstruct.ai/) for this tutorial, but if you have ROS2 installed on your own computer, you should be able to do ~everything on your own computer, except this creating a rosject part.
Let’s start by opening The Construct (https://www.theconstruct.ai/) and logging in. You can easily create a free account if you still don’t have one.
Once inside, let’s create My Rosjects and then, Create a new rosject if you decided taking this route:
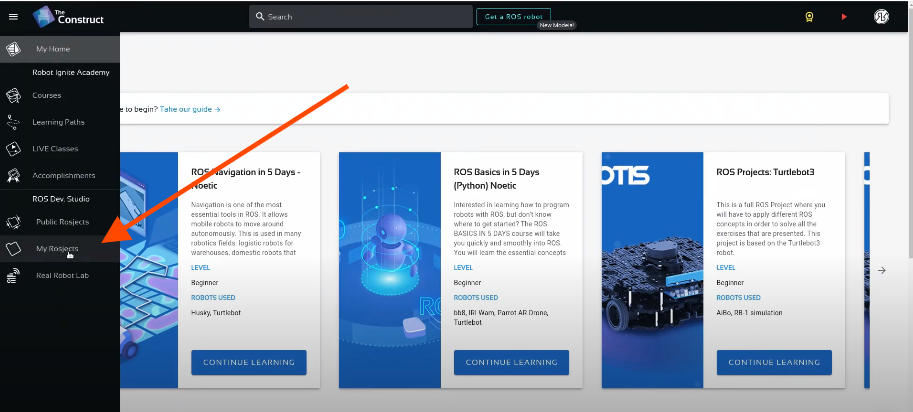
My Rosjects
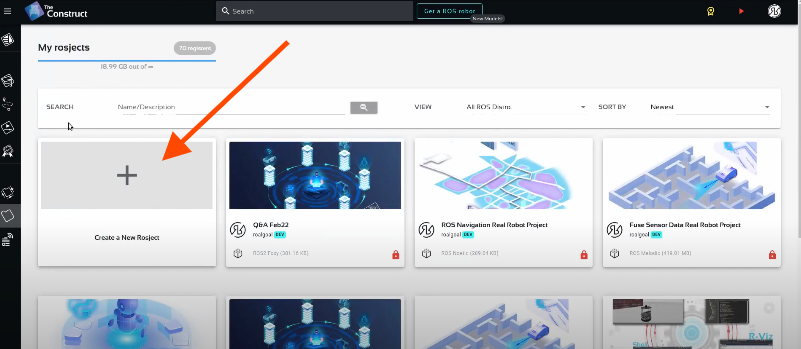
Create a new rosject
For the rosject, let’s select ROS2 Foxy for the ROS Distro, let’s name the rosject as you want. You can leave the rosject public. You should see the rosject you just created in your rosjects list (the name is certainly different from the example below that was added just for learning purposes)
List of rosjects – Using Depth camera in ROS2 to determine object distance
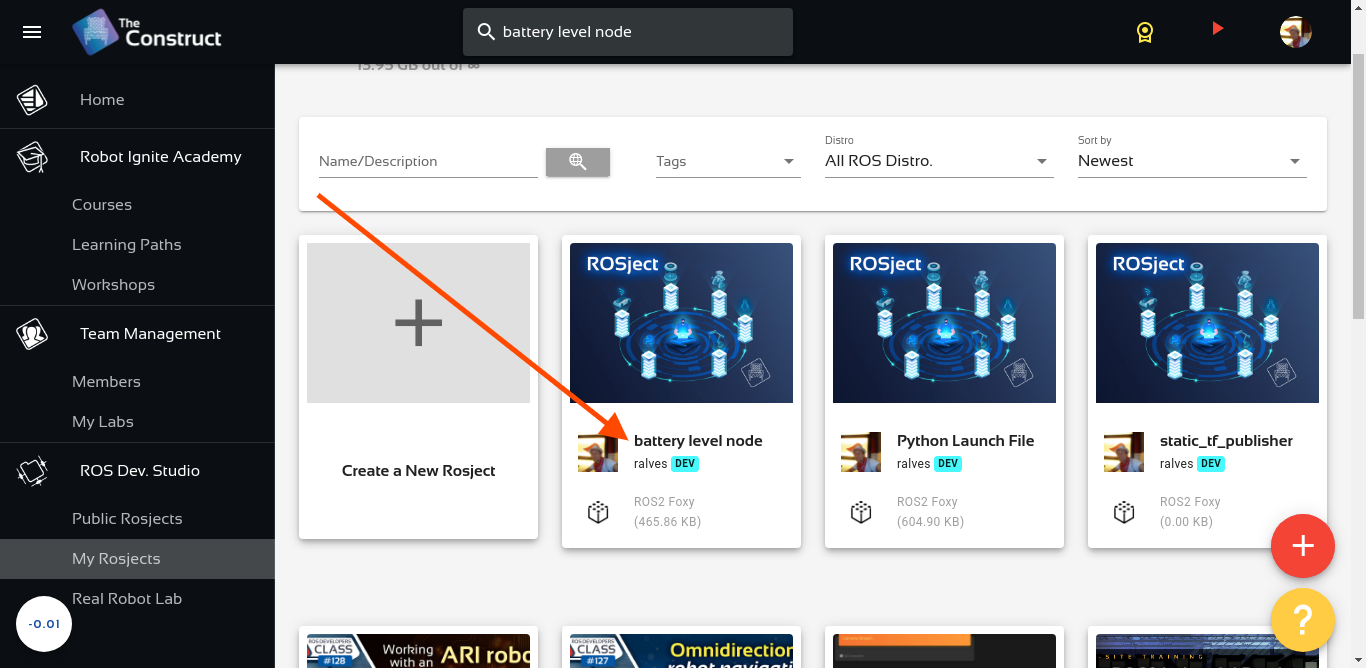
If you mouse over the recently created rosject, you should see a Run button. Just click that button to launch the rosject.
Launching the laser_scan_assember server to convert from laser scan to point cloud
Assuming you have a copy of the rosject, after opening it by clicking the Run button mentioned earlier, let’s open the IDE (Code Editor) to see its content.
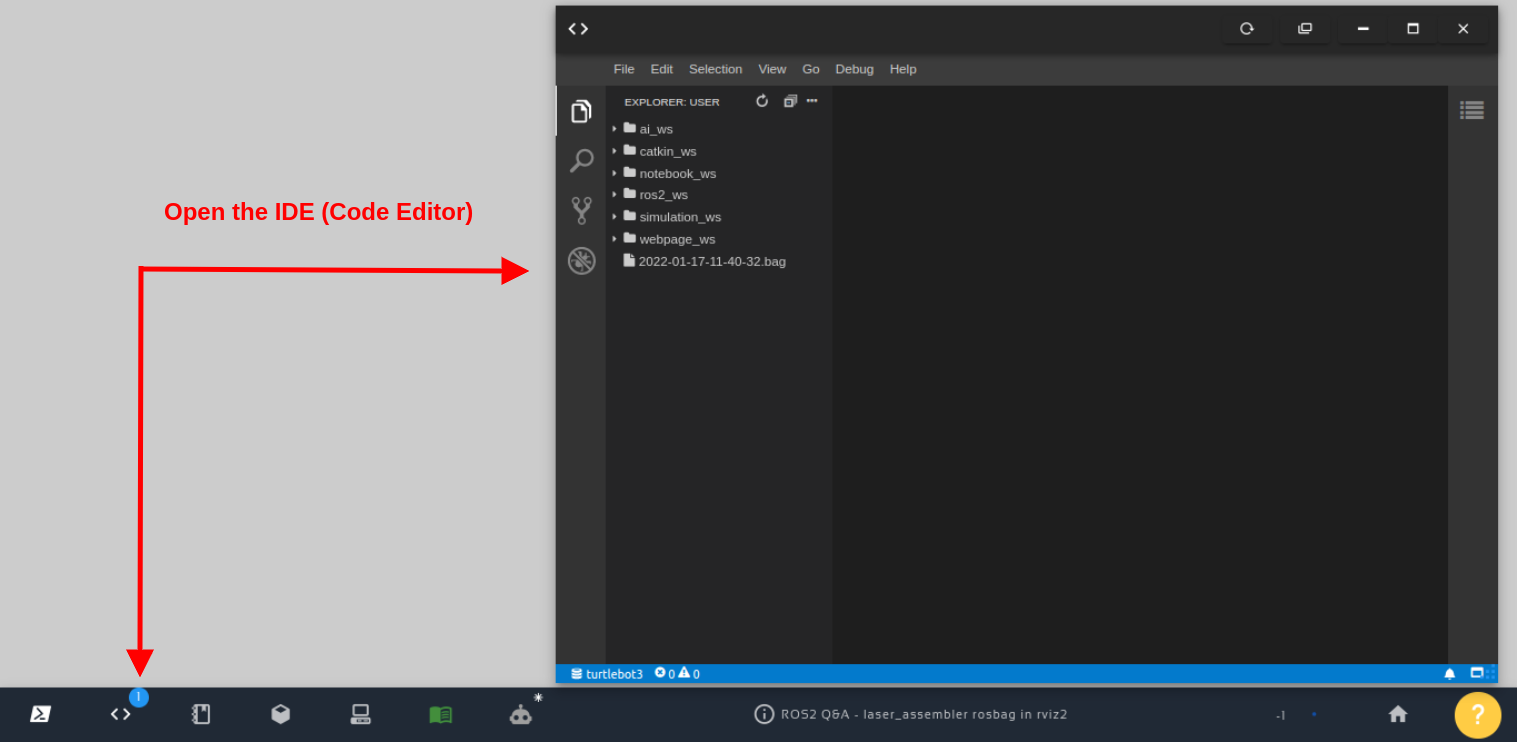
Open the IDE – Code Editor
You should see a rosbag file named 2022-01-17-11-40-32.bag, which is a rosbag for the turtlebot simulation.
In order to launch the laser_scan_assembler, we need a launch file. If you check carefully, you may notice that we already have a launch file under the path ~/catkin_ws/src/laser_assembler_demo/launch/assembler.launch.
Its content is as follows:
<launch>
    <node type="laser_scan_assembler" pkg="laser_assembler" name="my_assembler">
      <!-- <remap from="scan" to="tilt_scan"/> -->
      <param name="max_scans" type="int" value="400" />
      <param name="fixed_frame" type="string" value="base_footprint" />
    </node>
</launch>
Well, before launching that file, let’s learn how to record a rosbag file, in case you want at some point create your own:
Creating a rosbag file
In order to create a rosbag file, let’s start by opening a new terminal:
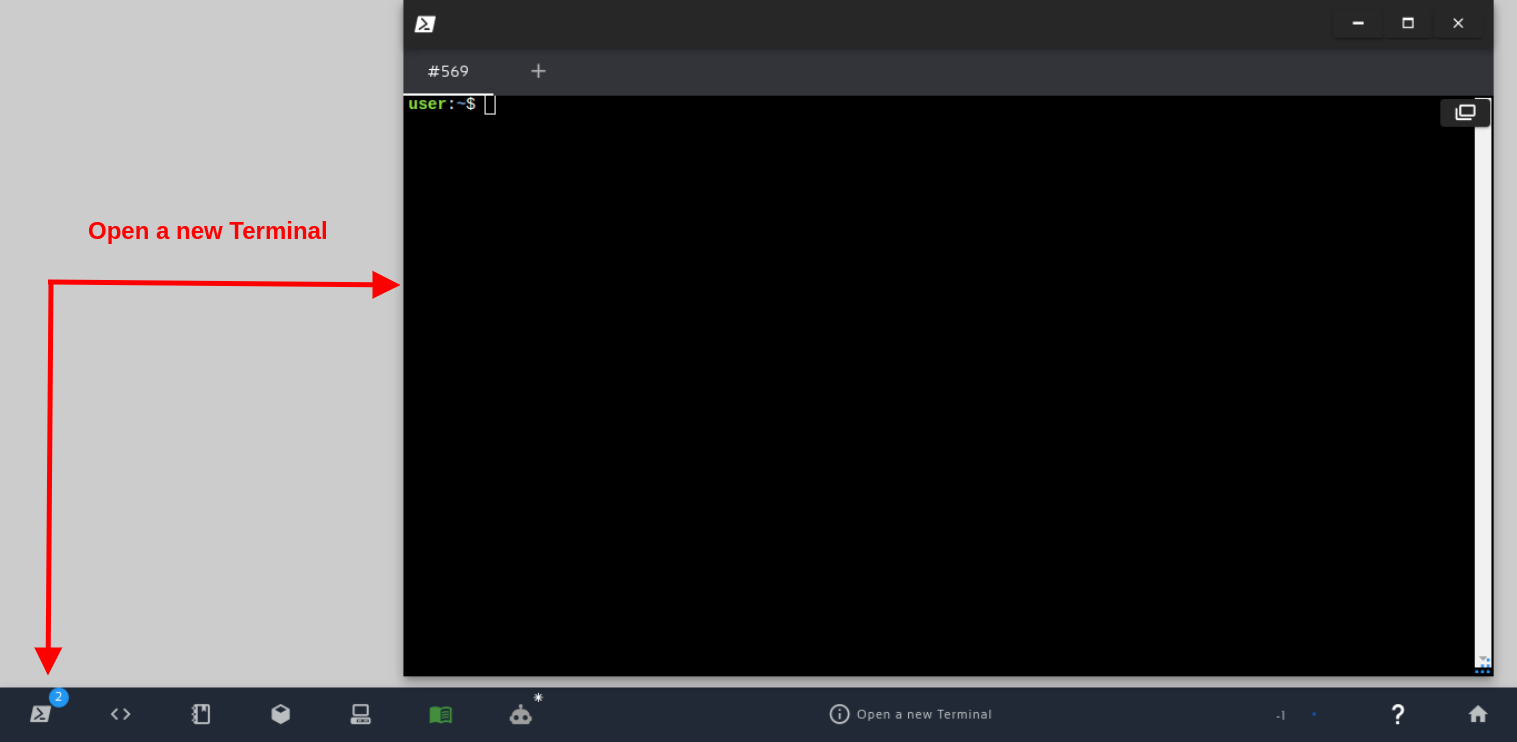
Open a new Terminal
After opening the shell, let’s source ROS Noetic:
source /opt/ros/noetic/setup.bash
Let’s also source the simulation_ws (simulation workspace), because it is where we have the turtlebot simulation
source simulation_ws/devel/setup.bash

rospack profile
Now, let’s launch a turtlebot simulation with the following commands:
export TURTLEBOT3_MODEL=burger

roslaunch turtlebot3_gazebo turtlebot3_world.launch
You can click Open Gazebo to make sure the simulation is running (although for you it may not show the blue laser in gazebo)
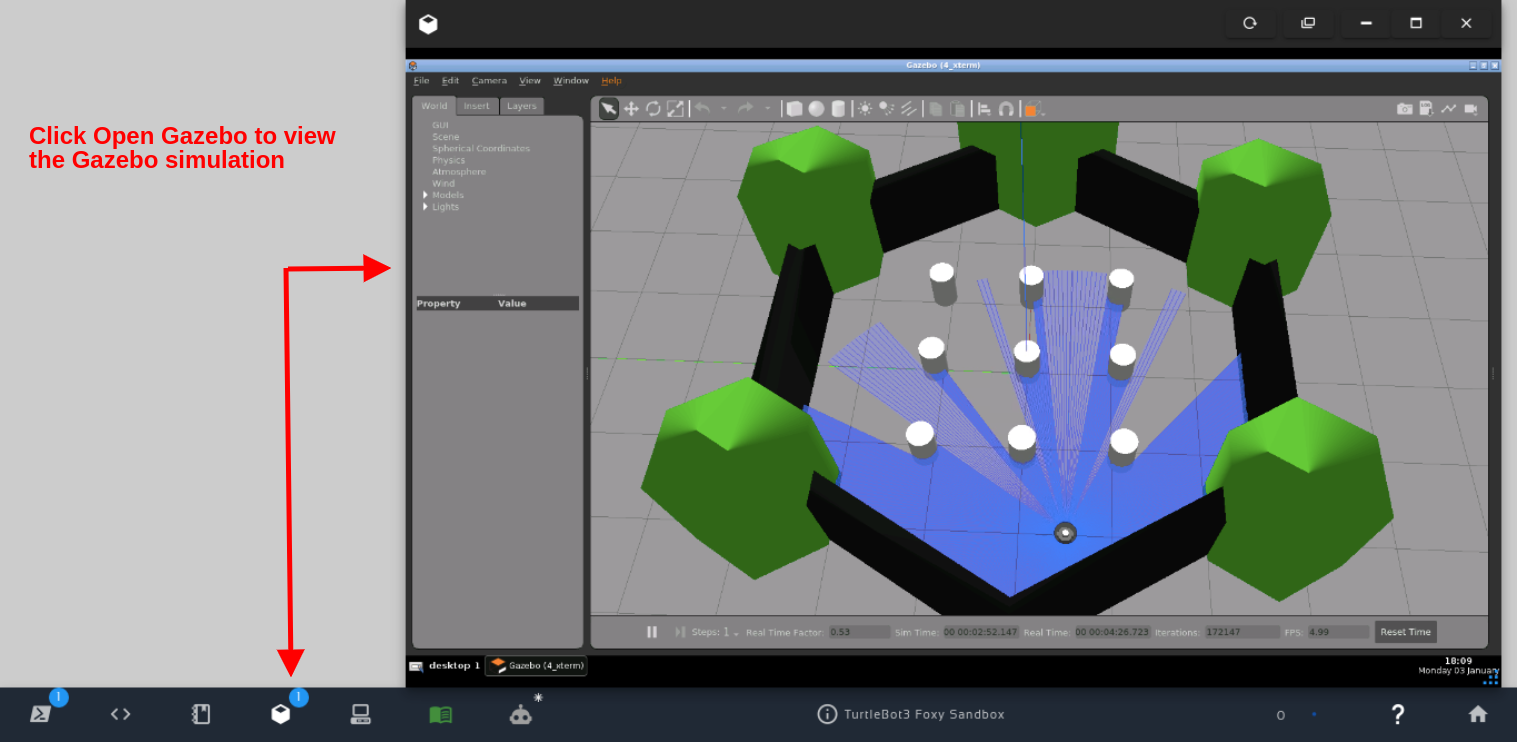
Click Open Gazebo to view the Gazebo simulation
You can now open a new web shell and list the topics with the following command:
source /opt/ros/noetic/setup.bash

rostopic list
The list of topics should be something like the following:
/clock
/cmd_vel
/gazebo/link_states
/gazebo/model_states
/gazebo/parameter_descriptions
/gazebo/parameter_updates
/gazebo/performance_metrics
/gazebo/set_link_state
/gazebo/set_model_state
/imu
/joint_states
/odom
/rosout
/rosout_agg
/scan
/tf
So, in order to record all topics in a rosbag file, you can just run the rosbag record -a command. You can press CTRL+C to stop recording, or youcan also especify the –duration param if you want to record only for a few seconds or minutes (because rosbag files grow really fast):
rosbag record -a --duration=1m
The logs should be similar to the following:
[ INFO] [1643640738.398965449, 298.390000000]: Recording to '2022-01-31-14-52-18.bag'.
[ INFO] [1643640738.402667915, 298.395000000]: Subscribing to /rosout_agg
[ INFO] [1643640738.408196688, 298.402000000]: Subscribing to /rosout
[ INFO] [1643640738.417414694, 298.406000000]: Subscribing to /clock
[ INFO] [1643640738.492442317, 298.422000000]: Subscribing to /gazebo/link_states
[ INFO] [1643640738.511223062, 298.468000000]: Subscribing to /gazebo/model_states
[ INFO] [1643640738.518154757, 298.481000000]: Subscribing to /gazebo/performance_metrics
[ INFO] [1643640738.526057506, 298.488000000]: Subscribing to /gazebo/parameter_descriptions
[ INFO] [1643640738.598167676, 298.535000000]: Subscribing to /gazebo/parameter_updates
[ INFO] [1643640738.784914410, 298.633000000]: Subscribing to /scan
[ INFO] [1643640738.795856579, 298.650000000]: Subscribing to /joint_states
[ INFO] [1643640738.806535006, 298.665000000]: Subscribing to /tf
[ INFO] [1643640738.817849095, 298.673000000]: Subscribing to /odom
[ INFO] [1643640738.901146360, 298.732000000]: Subscribing to /imu
Let’s use the rosbag file that already exists, called 2022-01-17-11-40-32.bag.
Playing a rosbag file
Now that we have learned how to record a rosbag file, let’s play the one that we already had, called 2022-01-17-11-40-32.bag.
Before that, let’s kill the simulation we launched previously (pressing CTRL+C in the terminal where we launched the simulation).
If we now check the topics again, we should have only the following 3 topics:
rostopic list

  /clock
  /rosout
  /rosout_agg
Let’s first start roscore:
roscore &
If you wait about ~5 seconds, roscore will be running. After that, we can run rosbag:
rosbag play 2022-01-17-11-40-32.bag
The output would be similar to the following:
setting /run_id to 5cbe4c68-82c9-11ec-bbc7-0242c0a86007
[ INFO] [1643656195.261386757]: Connected to master at [1_xterm:11311]
[ INFO] [1643656195.265748530]: Opening 2022-01-17-11-40-32.bag
process[rosout-1]: started with pid [1430]
started core service [/rosout]

Waiting 0.2 seconds after advertising topics... done.

Hit space to toggle paused, or 's' to step.
[RUNNING]  Bag Time:    345.418104   Duration: 13.739104 / 70.197000
If we now check the topics again in another terminal, we will have the topics listed again:
source /opt/ros/noetic/setup.bash

rostopic list
which would give us:
/clock
/gazebo/link_states
/gazebo/model_states
/gazebo/parameter_descriptions
/gazebo/parameter_updates
/gazebo/performance_metrics
/imu
/joint_states
/odom
/rosout
/rosout_agg
/scan
/tf
/tf_static
You can now kill the rosbag play process, now that you learned how to play it and how it works.
Launching the laser_scan_assember server to convert from laser scan to point cloud
Let’s start by opening 6 terminals. If you want, you can name them like the names below to easily know what each terminal is doing:
- 1 – roscore
- 2 – rosbag
- 3 – assembler
- 4 – call_assembler
- 5 – bridge
- 6 – rviz2
In the end, you would have something like the following image:
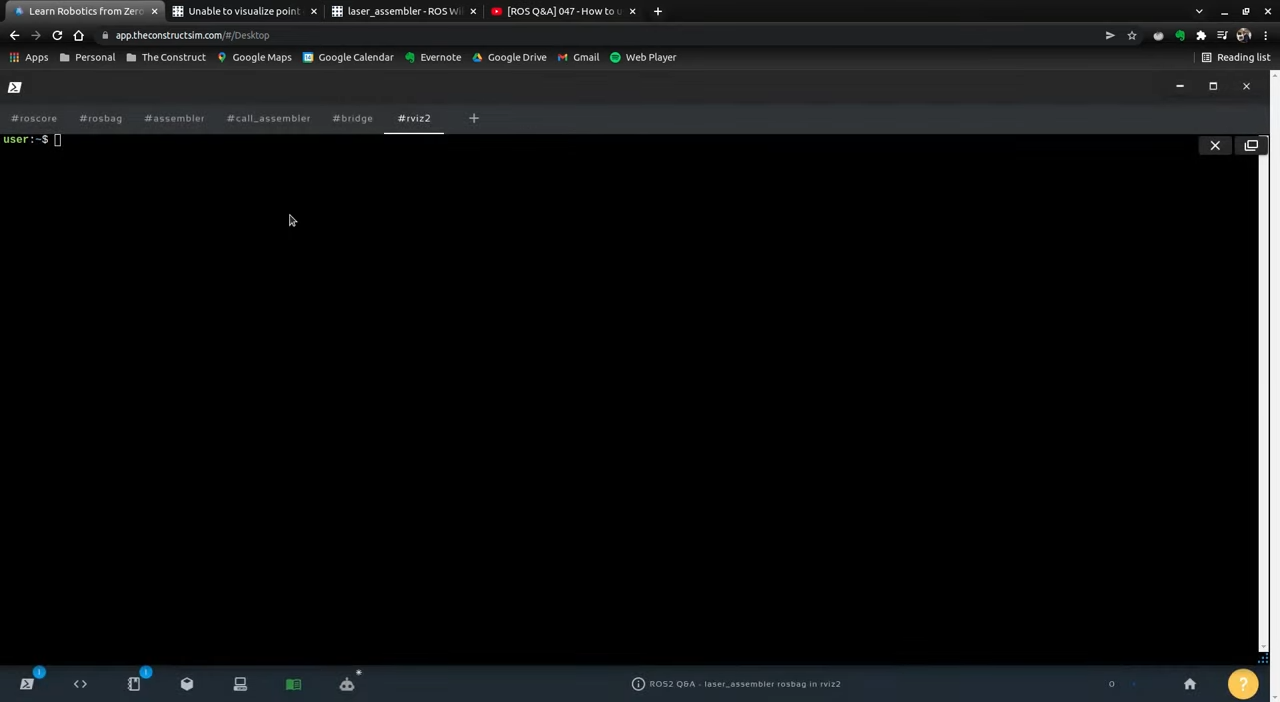
How to work with rosbags and laser_assembler in ROS2 14-36
Let’s launch roscore in the first terminal (named roscore) if you have killed it:
source /opt/ros/noetic/setup.bash

roscore
Now let’s run rosbag play in the second terminal:
source /opt/ros/noetic/setup.bash

while true; do rosbag play 2022-01-17-11-40-32.bag; sleep 1; done
The reason why we are running inside a while loop is because it finishes after ~70 seconds, which is the duration of the rosbag file. By being inside the while loop, it keeps running “forever” until we stop it with CTRL+C.
Now in the third terminal, let’s run the laser assembler:
source ~/catkin_ws/devel/setup.bash

roslaunch laser_assembler_demo assembler.launch
Let’s now in the 4th terminal and list the services:
source ~/catkin_ws/devel/setup.bash

rosservice list
You should see the services running.:
/assemble_scans
/assemble_scans2
/build_cloud
/build_cloud2
/my_assembler/get_loggers
/my_assembler/set_logger_level
/play_1643657183488619006/get_loggers
/play_1643657183488619006/pause_playback
/play_1643657183488619006/set_logger_level
/rosout/get_loggers
/rosout/set_logger_level
Still in the 4th terminal, we can now run the node used to call the assembler:
rosrun laser_assembler_demo call_assembler.py
The output you should get must be similar to the following:
Got cloud with 2592000 points
Got cloud with 2592000 points
Got cloud with 2592000 points
Got cloud with 2592000 points
...
Everything so far was running in ROS1. Let’s now run ros1_bridge in the 5th terminal to be able to see the topics in ROS2.
source /opt/ros/noetic/setup.bash

source /opt/ros/foxy/setup.bash

ros2 run ros1_bridge  dynamic_bridge --bridge-all-topics
Among other text output, you should see the following:
created 1to2 bridge for topic '/clock' with ROS 1 type 'rosgraph_msgs/Clock' and ROS 2 type 'rosgraph_msgs/msg/Clock'
created 1to2 bridge for topic '/gazebo/link_states' with ROS 1 type 'gazebo_msgs/LinkStates' and ROS 2 type 'gazebo_msgs/msg/LinkStates'
created 1to2 bridge for topic '/gazebo/model_states' with ROS 1 type 'gazebo_msgs/ModelStates' and ROS 2 type 'gazebo_msgs/msg/ModelStates'
created 1to2 bridge for topic '/imu' with ROS 1 type 'sensor_msgs/Imu' and ROS 2 type 'sensor_msgs/msg/Imu'
created 1to2 bridge for topic '/joint_states' with ROS 1 type 'sensor_msgs/JointState' and ROS 2 type 'sensor_msgs/msg/JointState'
created 1to2 bridge for topic '/laser_pointcloud' with ROS 1 type 'sensor_msgs/PointCloud2' and ROS 2 type 'sensor_msgs/msg/PointCloud2'
created 1to2 bridge for topic '/odom' with ROS 1 type 'nav_msgs/Odometry' and ROS 2 type 'nav_msgs/msg/Odometry'
created 1to2 bridge for topic '/rosout' with ROS 1 type 'rosgraph_msgs/Log' and ROS 2 type 'rcl_interfaces/msg/Log'
created 1to2 bridge for topic '/rosout_agg' with ROS 1 type 'rosgraph_msgs/Log' and ROS 2 type 'rcl_interfaces/msg/Log'
created 1to2 bridge for topic '/scan' with ROS 1 type 'sensor_msgs/LaserScan' and ROS 2 type 'sensor_msgs/msg/LaserScan'
created 1to2 bridge for topic '/tf' with ROS 1 type 'tf2_msgs/TFMessage' and ROS 2 type 'tf2_msgs/msg/TFMessage'
created 1to2 bridge for topic '/tf_static' with ROS 1 type 'tf2_msgs/TFMessage' and ROS 2 type 'tf2_msgs/msg/TFMessage
Now, let’s launch rviz2 in the 6th terminal:
rviz2
If you now open the Graphical Tools, you should be able to see rviz:
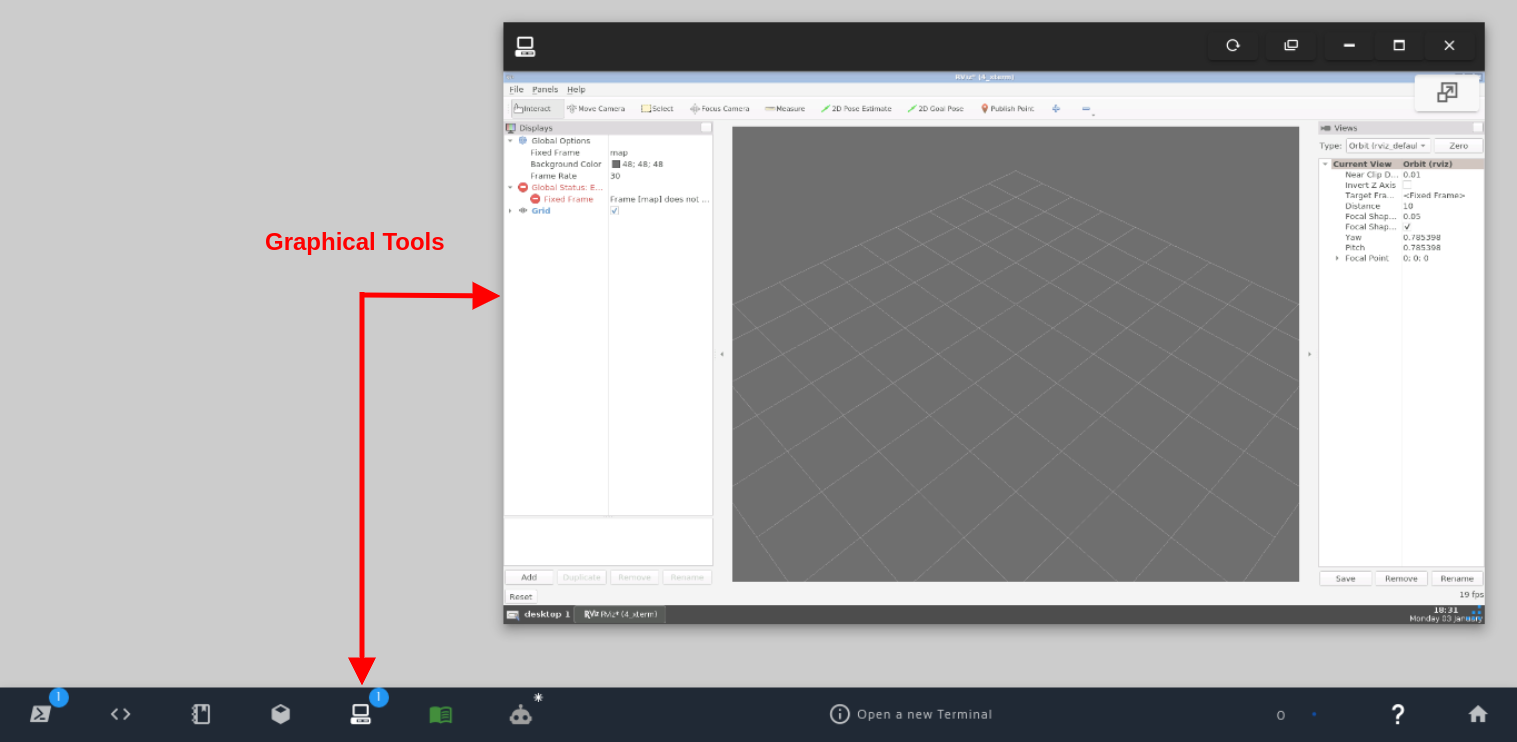
Open Graphical Tools / rviz
Once you have opened the Graphical Tools, let’s change the Fixed Frame in rviz2 to /base_footprint instead of /map.
Let’s also click Add (in the left bottom of rviz2) and select a Point Cloud2. After the PointCloud2 was added, let’s select the topic /laser_pointcloud (as defined on ~/catkin_ws/src/laser_assembler_demo/src/call_assembler.py):
Now, you should be able to see the laser being shown in rviz2 (in red).
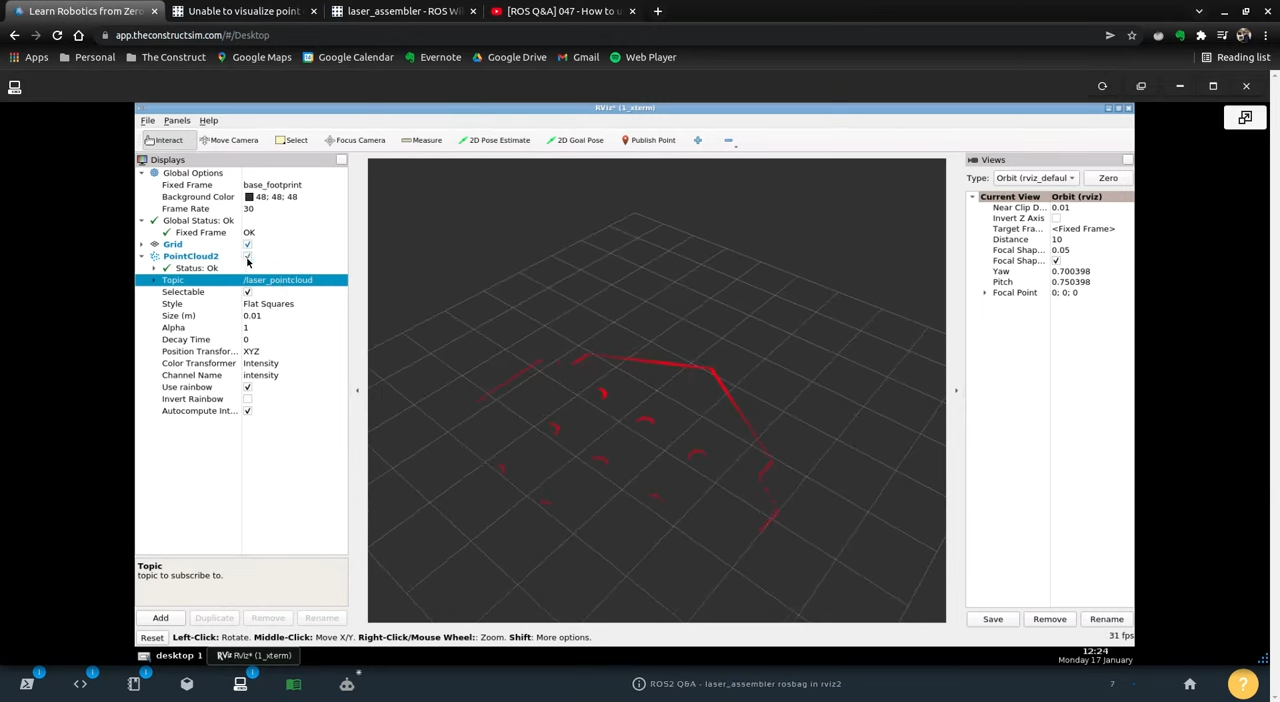
Laser Pointcloud being output in rviz2 with ros1_bridge
Congratulations. You now know how to work with rosbags and laser_assembler in ROS2.
Youtube video
So this is the post for today. Remember that we have the live version of this post on YouTube. If you liked the content, please consider subscribing to our youtube channel. We are publishing new content ~every day.
Keep pushing your ROS Learning.
Related Courses & Training
If you want to learn more about ROS and ROS2, we recommend the following courses:

0 Comments