
What we are going to learn
- How to set up the TurtleBot3 packages in ROS
- How to use transforms to obtain robot position
List of resources used in this post
- The Construct: https://app.theconstructsim.com/
- Repositories:
- This post answers the following question asked on ROS Answers: https://answers.ros.org/question/376611/getting-the-position-of-turtlebot3-using-transforms/
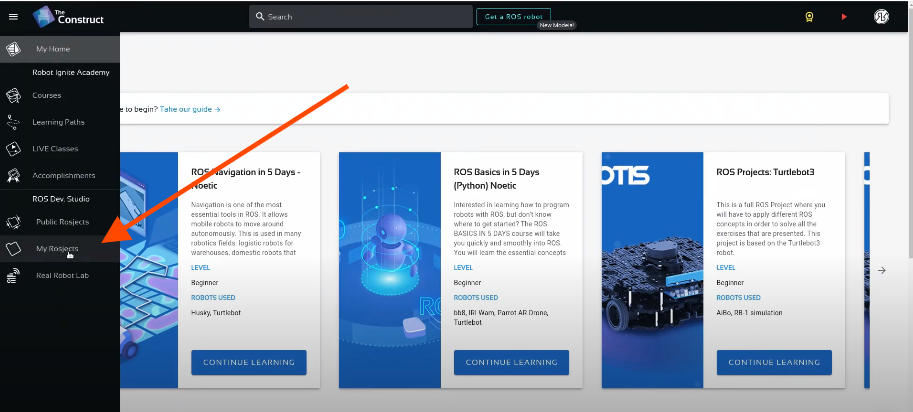
Creating a rosject
In order to learn how to get the robot position using transforms in ROS, let’s start by creating a rosject (ROS project). We are going to use The Construct (https://www.theconstruct.ai/) for this tutorial, but if you have ROS2 installed on your own computer, you should be able to do ~everything on your own computer, except this creating a rosject part.
Let’s start by opening The Construct (https://www.theconstruct.ai/) and logging in. You can easily create a free account if you still don’t have one.
Once inside, let’s create My Rosjects and then, Create a new rosject:
My Rosjects
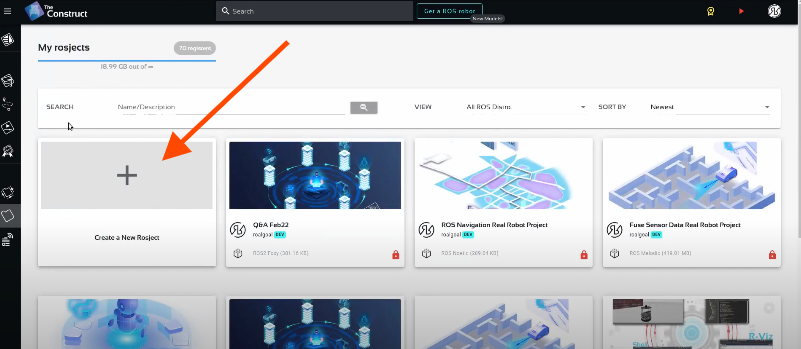
Create a new rosject
For the rosject, let’s select ROS2 Foxy for the ROS Distro, let’s name the rosject as Turtlebot3 Foxy Sandbox. You can leave the rosject public.
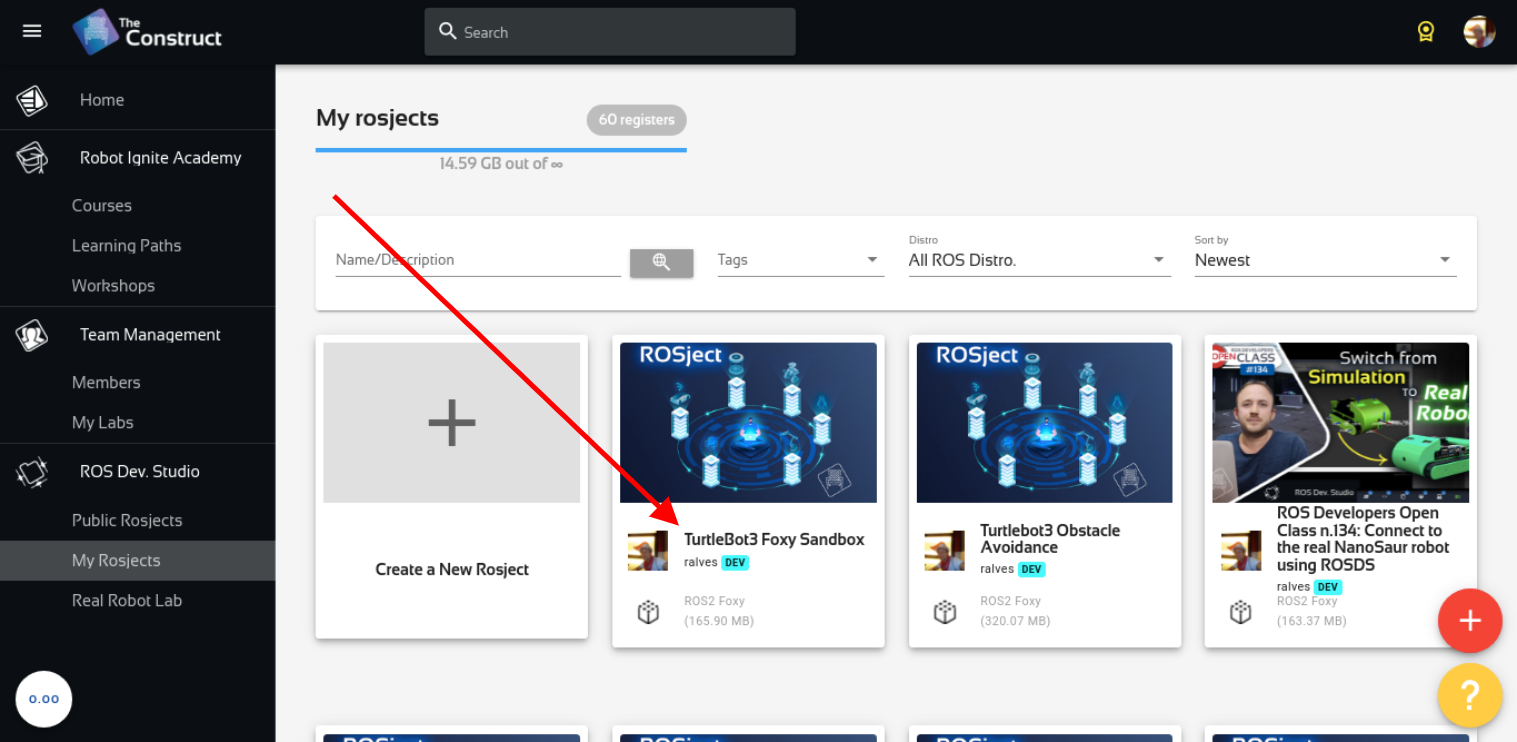
Turtlebot3 Foxy Sandbox – How to get robot position using transforms in ROS2
If you mouse over the recently created rosject, you should see a Run button. Just click that button to launch the rosject.
Cloning the required repositories with the simulations
After we have created our rosject and opened it, let’s now open a terminal as we can see in the image below:
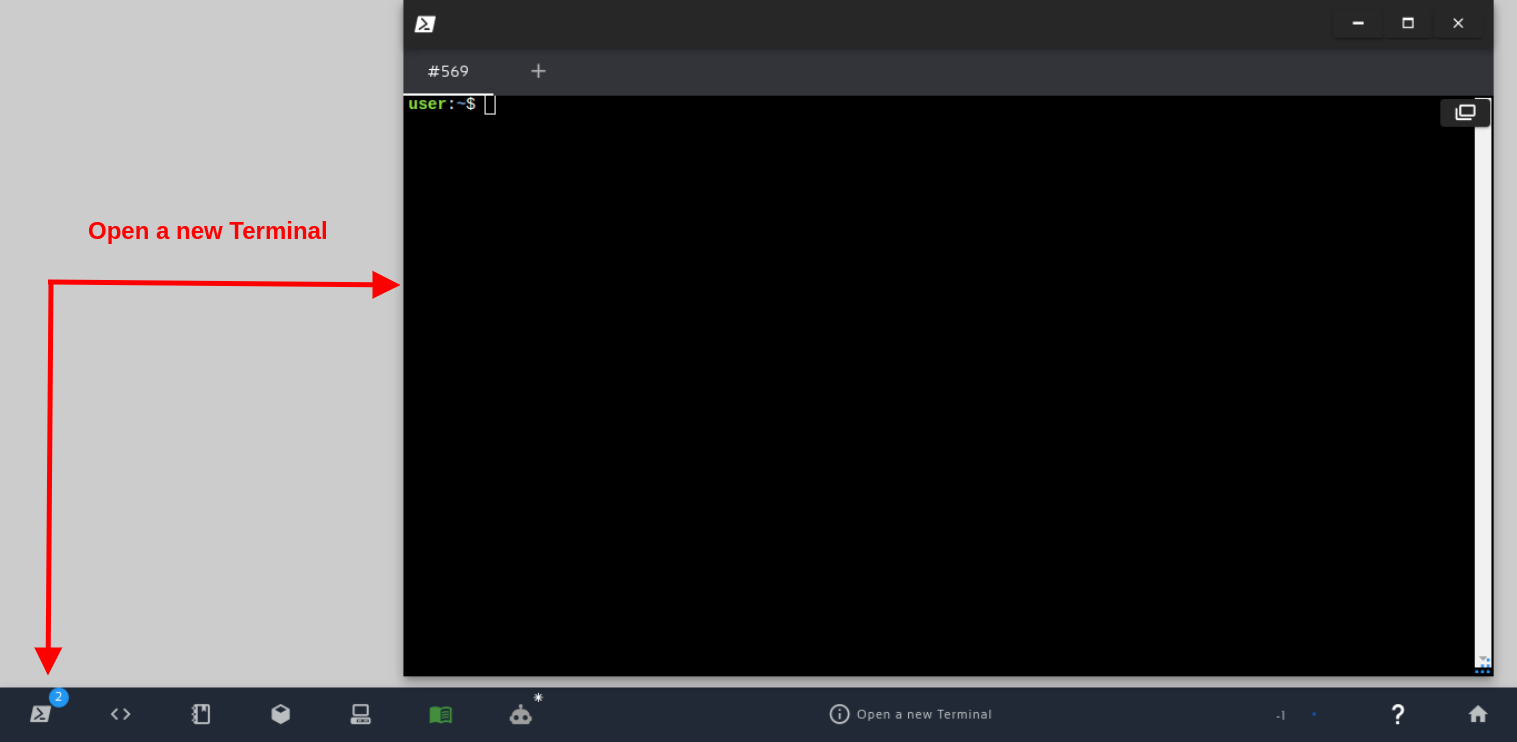
Open a new Terminal
After that, let’s enter into the ~/ros2_ws/src directory and clone three repositories there with the following commands:
cd ~/ros2_ws/src

git clone -b foxy-devel https://github.com/ROBOTIS-GIT/turtlebot3

git clone -b foxy-devel https://github.com/ROBOTIS-GIT/turtlebot3_msgs

git clone -b foxy-devel https://github.com/ROBOTIS-GIT/turtlebot3_simulations
Compiling the turtlebot simulations with ROS2
We should now be able to compile our workspace with:
cd ~/ros2_ws/

colcon build
If everything has worked as expected, you should have the following output:
Starting >>> turtlebot3_msgs
Starting >>> turtlebot3_description
Starting >>> turtlebot3_cartographer
Starting >>> turtlebot3_navigation2
Starting >>> turtlebot3_teleop
Finished <<< turtlebot3_cartographer [1.53s]
Finished <<< turtlebot3_navigation2 [1.61s]
Finished <<< turtlebot3_description [1.63s]
Starting >>> turtlebot3_gazebo
Finished <<< turtlebot3_teleop [1.63s]
Finished <<< turtlebot3_msgs [2.08s]
Starting >>> turtlebot3_node
Starting >>> turtlebot3_example
Starting >>> turtlebot3_fake_node
Finished <<< turtlebot3_fake_node [1.05s]
Finished <<< turtlebot3_node [1.16s]
Starting >>> turtlebot3_bringup
Finished <<< turtlebot3_example [1.40s]
Finished <<< turtlebot3_bringup [1.89s]
Starting >>> turtlebot3
Finished <<< turtlebot3 [1.48s]
Finished <<< turtlebot3_gazebo [16.9s]
Starting >>> turtlebot3_simulations
Finished <<< turtlebot3_simulations [1.32s]

Summary: 12 packages finished [20.3s]
It may happen that the colcon build command take about 2 minutes to finish.
If for whatever reason you have an error like the one below, just re-run colcon build and it will compile ok the second time:
[Processing: turtlebot3_fake_node, turtlebot3_gazebo, turtlebot3_node]
Finished <<< turtlebot3_fake_node [12min 12s]
--- stderr: turtlebot3_gazebo
c++: fatal error: Killed signal terminated program cc1plus
compilation terminated.
make[2]: *** [CMakeFiles/obstacle1.dir/build.make:63: CMakeFiles/obstacle1.dir/models/turtlebot3_dqn_world/obstacle_plugin/obstacle1.cc.o] Error 1
make[1]: *** [CMakeFiles/Makefile2:165: CMakeFiles/obstacle1.dir/all] Error 2
make[1]: *** Waiting for unfinished jobs....
make: *** [Makefile:141: all] Error 2
---
Failed   <<< turtlebot3_gazebo [12min 49s, exited with code 2]
Aborted  <<< turtlebot3_node [13min 3s]

Summary: 7 packages finished [13min 56s]
  1 package failed: turtlebot3_gazebo
  1 package aborted: turtlebot3_node
  1 package had stderr output: turtlebot3_gazebo
  3 packages not processed
When this error happens, is just because of a lack of memory or CPU. Normally, after running colcon build again the package gets compiled.
Launching the Turtlebot3 Simulation with ROS2
So far we have created a rosject, cloned the repositories that contain the turtlebot3 simulations, and we have also compiled the packages. The time has come now to finally launch our simulation.
Let’s start by sourcing the workspace that we just compiled:
source install/setup.bash
Let’s also modify the ~/.bashrc so that it exports the variable GAZEBO_MODEL_PATH so that gazebo can find turtlebot models, and also export TURTLEBOT3_MODEL variable so that the package turtlebot3_gazebo knows which turtlebot to launch:
echo 'export GAZEBO_MODEL_PATH=$GAZEBO_MODEL_PATH:~/ros2_ws/src/turtlebot3_simulations/turtlebot3_gazebo/models' >> ~/.bashrc

echo 'export TURTLEBOT3_MODEL=burger' >> ~/.bashrc
If we now check the ~/.bashrc file, which is saved when your rosject gets saved, we can see that the variables we are interested in are set in this file. (You can check it with the tail ~/.bashrc command).
# Note from The Construct
# -----------------------------------------------------
# This file will be saved together with your rosject.
# Add your custom exports at the end of this file. E.g.:
# export MY_SETTING=value
# export GAZEBO_RESOURCE_PATH=$GAZEBO_RESOURCE_PATH:/home/user/simulation_ws/src/my_package
# -----------------------------------------------------

export GAZEBO_MODEL_PATH=$GAZEBO_MODEL_PATH:~/ros2_ws/src/turtlebot3_simulations/turtlebot3_gazebo/models
export TURTLEBOT3_MODEL=burger
Now, let’s source that file so that our variables get exported in the terminal that is already open. It is worth mentioning that when you open new terminals, the variables will be automatically exported since bash automatically sources ~/.bashrc for new terminals.
source ~/.bashrc
We should now be able to launch the simulation. Let’s use the following command for this purpose:
ros2 launch turtlebot3_gazebo turtlebot3_world.launch.py
Assuming that everything went as expected, the expected output is similar to the following:
[INFO] [launch]: All log files can be found below /home/user/.ros/log/2022-01-03-18-04-58-484869-4_xterm-7991
[INFO] [launch]: Default logging verbosity is set to INFO
urdf_file_name : turtlebot3_burger.urdf
[INFO] [gzserver-1]: process started with pid [8011]
[INFO] [gzclient   -2]: process started with pid [8013]
[INFO] [robot_state_publisher-3]: process started with pid [8015]
[gzclient   -2] ++ ls /usr/bin/gzclient-11.5.1
[gzclient   -2] + gzclient_path=/usr/bin/gzclient-11.5.1
[gzclient   -2] + DISPLAY=:2
[gzclient   -2] + /usr/bin/gzclient-11.5.1
[robot_state_publisher-3] [WARN] [1641233102.776304734] [robot_state_publisher]: No robot_description parameter, but command-line argument available.  Assuming argument is name of URDF file.  This backwards compatibility fallback will be removed in the future.
[robot_state_publisher-3] Parsing robot urdf xml string.
[robot_state_publisher-3] Link base_link had 5 children
[robot_state_publisher-3] Link caster_back_link had 0 children
[robot_state_publisher-3] Link imu_link had 0 children
[robot_state_publisher-3] Link base_scan had 0 children
[robot_state_publisher-3] Link wheel_left_link had 0 children
[robot_state_publisher-3] Link wheel_right_link had 0 children
[robot_state_publisher-3] [INFO] [1641233102.786920419] [robot_state_publisher]: got segment base_footprint
[robot_state_publisher-3] [INFO] [1641233102.786951740] [robot_state_publisher]: got segment base_link
[robot_state_publisher-3] [INFO] [1641233102.786960417] [robot_state_publisher]: got segment base_scan
[robot_state_publisher-3] [INFO] [1641233102.786967879] [robot_state_publisher]: got segment caster_back_link
[robot_state_publisher-3] [INFO] [1641233102.786975239] [robot_state_publisher]: got segment imu_link
[robot_state_publisher-3] [INFO] [1641233102.786982406] [robot_state_publisher]: got segment wheel_left_link
[robot_state_publisher-3] [INFO] [1641233102.786989655] [robot_state_publisher]: got segment wheel_right_link
[gzserver-1] [INFO] [1641233113.680311324] [turtlebot3_imu]: <initial_orientation_as_reference> is unset, using default value of false to comply with REP 145 (world as orientation reference)
[gzserver-1] [INFO] [1641233114.186860606] [turtlebot3_diff_drive]: Wheel pair 1 separation set to [0.160000m]
[gzserver-1] [INFO] [1641233114.186930065] [turtlebot3_diff_drive]: Wheel pair 1 diameter set to [0.066000m]
[gzserver-1] [INFO] [1641233114.188655864] [turtlebot3_diff_drive]: Subscribed to [/cmd_vel]
[gzserver-1] [INFO] [1641233114.191645383] [turtlebot3_diff_drive]: Advertise odometry on [/odom]
[gzserver-1] [INFO] [1641233114.193357059] [turtlebot3_diff_drive]: Publishing odom transforms between [odom] and [base_footprint]
[gzserver-1] [INFO] [1641233114.210184212] [turtlebot3_joint_state]: Going to publish joint [wheel_left_joint]
[gzserver-1] [INFO] [1641233114.210260508] [turtlebot3_joint_state]: Going to publish joint [wheel_right_joint]
If we now open Gazebo by clicking the Open Gazebo button that appears after we hover the mouse over the Gazebo icon, we should be able to see the simulation:
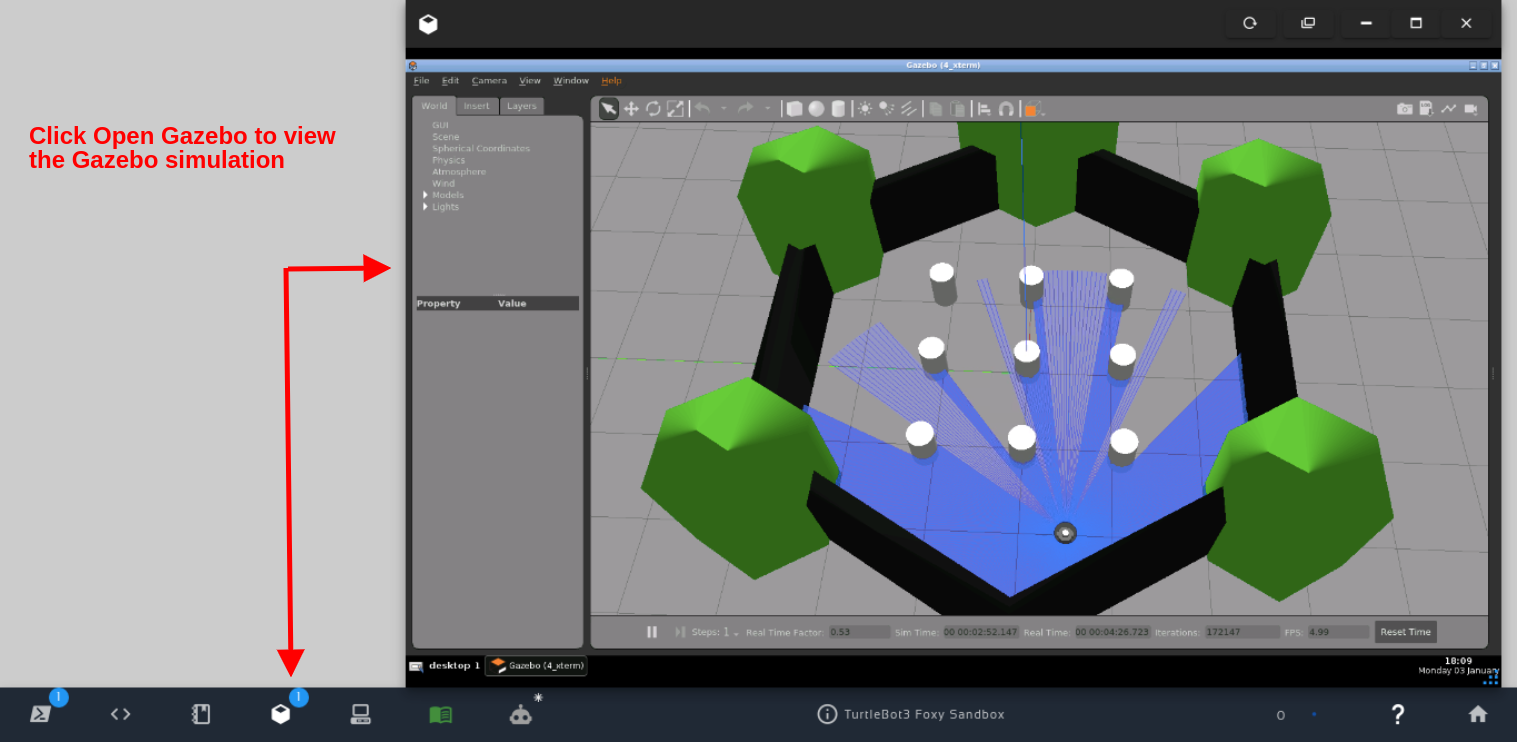
Click Open Gazebo to view the Gazebo simulation
Let’s now open a second terminal and launch rviz2 with:
rviz2
The expected output is similar to the following:
QStandardPaths: XDG_RUNTIME_DIR not set, defaulting to '/tmp/runtime-user'
[INFO] [1641234625.339611435] [rviz2]: Stereo is NOT SUPPORTED
[INFO] [1641234625.339811208] [rviz2]: OpenGl version: 3.1 (GLSL 1.4)
[INFO] [1641234625.775585724] [rviz2]: Stereo is NOT SUPPORTED
Now, in order to see the rviz window, we have to open the Graphical Tools:
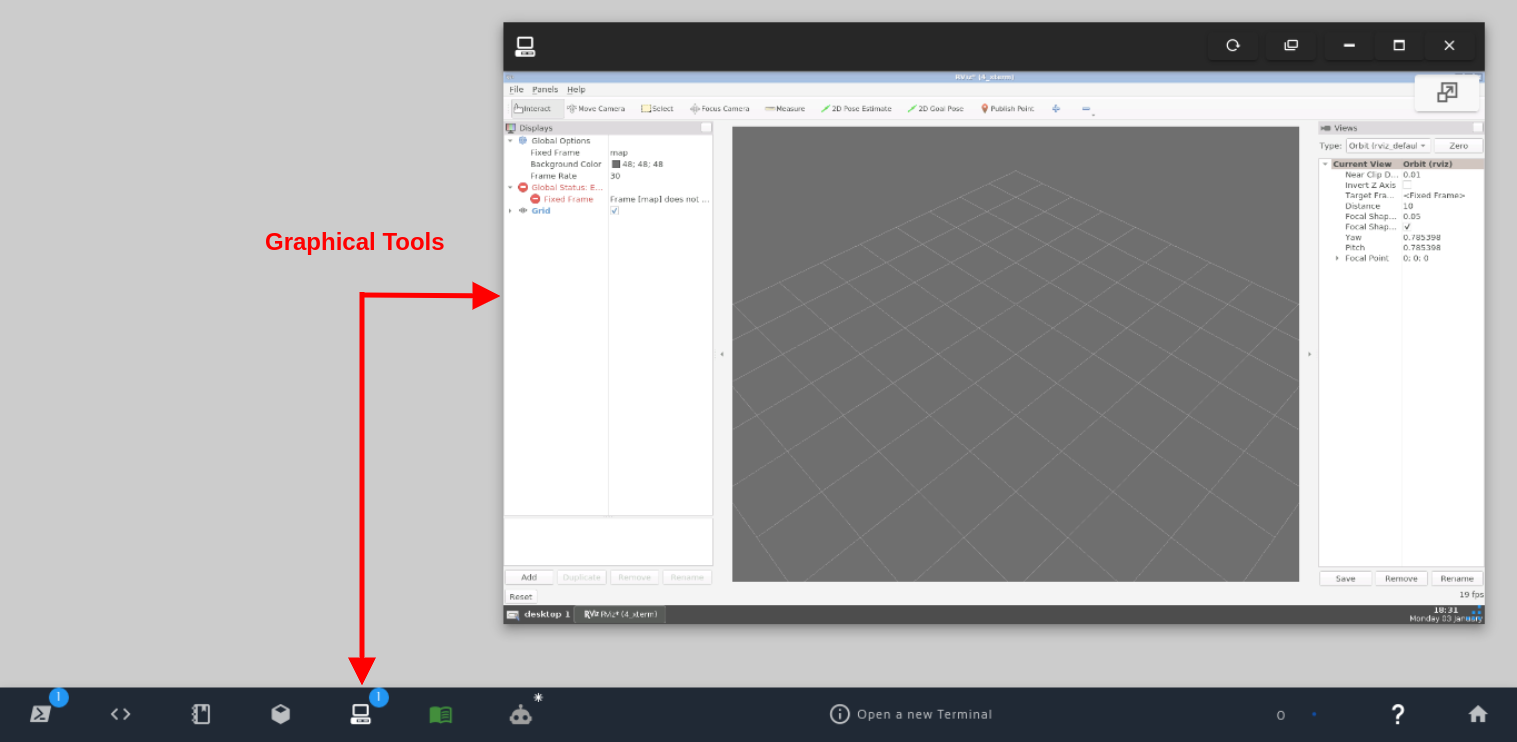
Open Graphical Tools / rviz
If we now look at the left side of the rviz window, we can see a red error message saying:
Frame [map] does not exist
Let’s change that fixed frame from map to base_link to get rid of this error message:
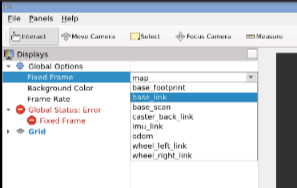
Select base_link as the fixed frame
After having selected base_link for the Fixed Frame, let’s now click the Add button available on the bottom left corner of rviz, and select TF.
After adding TF, we should see the transforms in RViz.

RViz – TF base_link and base_footprint to odom
The group with more frames is the robot, and the one with fewer frames is the odometry.
Launching the cartographer node
We need to launch the cartographer node to get the map frame published, but before that, let’s change the ~/ros2_ws/src/turtlebot3/turtlebot3_cartographer/launch/cartographer.launch.py (around line 53) and set use_sim_time to true. It is false by default because the code is ready for the real robot, but since we are using simulation, we have to change the variable.
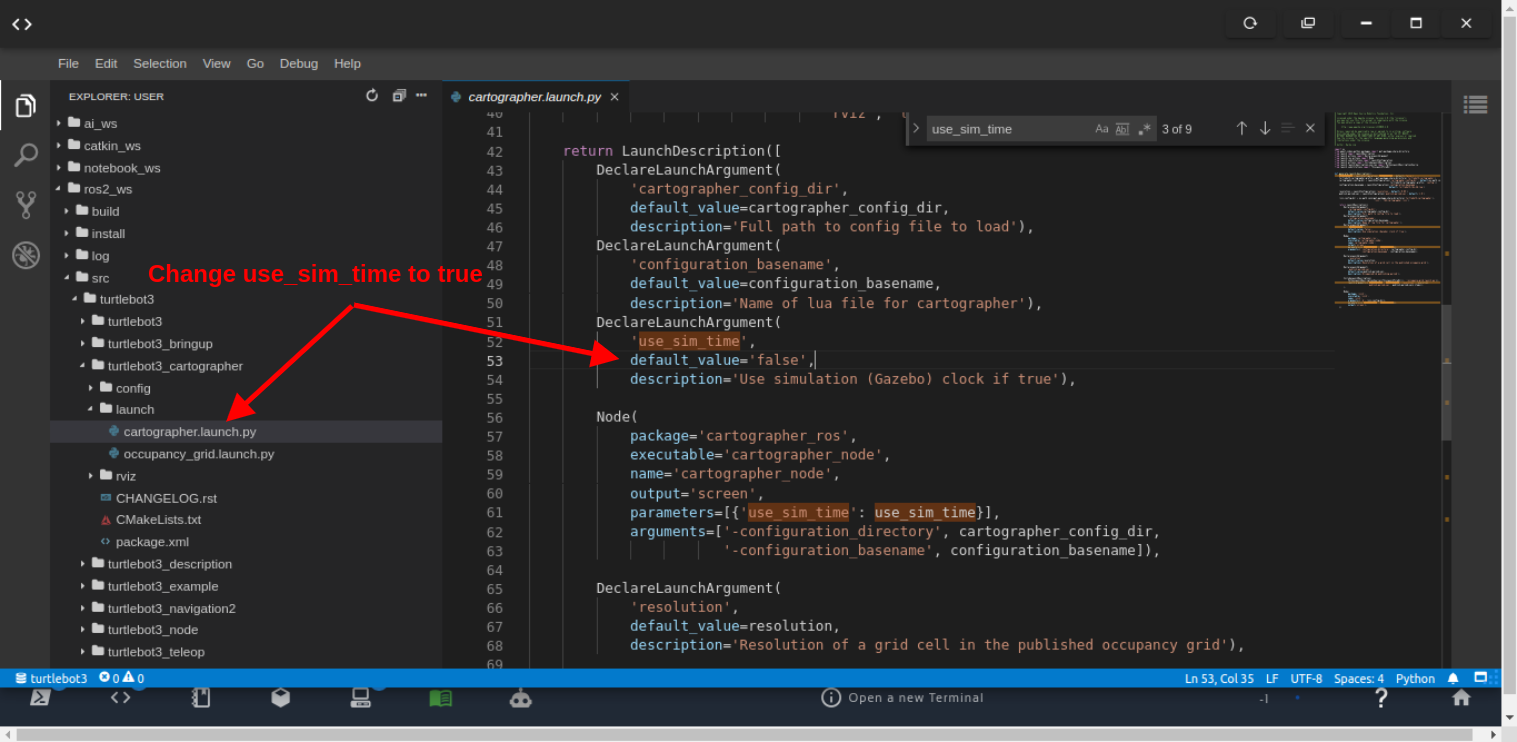
Set use_sim_time to true
Let’s now kill the rviz2 process by pressing CTRL+C in the terminal where it was launched, because the launch file we are going to launch now will start rviz2 anyway.
Make sure the command you ran in the first terminal is still running (do not rerun it if it is still running):
ros2 launch turtlebot3_gazebo turtlebot3_world.launch.py
Now in the second terminal, where we just stopped rviz2, let’s launch the cartographer with:
source ros2_ws/install/setup.bash

 ros2 launch turtlebot3_cartographer cartographer.launch.py
If we now open the graphical tools again, we should see a nice rviz2 configuration, and the map as the fixed frame now works:
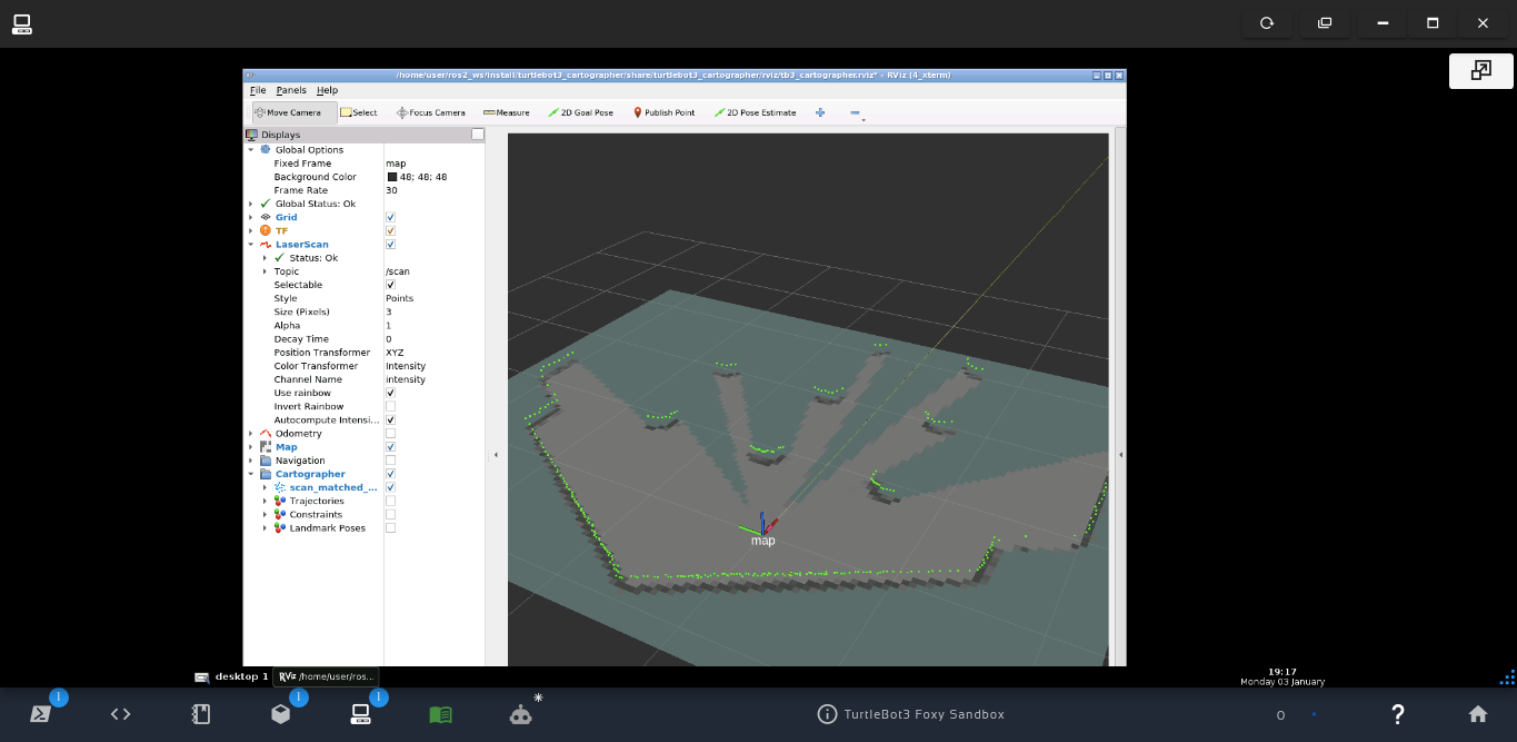
ros2 launch turtlebot3_cartographer cartographer.launch.py
The cartographer node is the one publishing the tf for the map.
We should now to able to move the robot using the keyboard so that the map is more accurate. For that, let’s launch the teleop_keyboard node with the following commands in a third terminal:
source ros2_ws/install/setup.bash

ros2 run turtlebot3_teleop teleop_keyboard
That command should give us the instructions how to move the robot around:
Control Your TurtleBot3!
---------------------------
Moving around:
        w
   a    s    d
        x

w/x : increase/decrease linear velocity (Burger : ~ 0.22, Waffle and Waffle Pi : ~ 0.26)
a/d : increase/decrease angular velocity (Burger : ~ 2.84, Waffle and Waffle Pi : ~ 1.82)

space key, s : force stop

CTRL-C to quit
You can now press any of the keys a w s d x to move the robot.
If you check the graphical tools again, you should see a more accurate map.
Getting the position of Turtlebot3 using transforms
We are almost there. We have already compiled the simulation, launched it, and launched the cartographer node.
Now, in order to get the position, we just need to do an echo between the frames to figure out the position.
Let’s echo the frames with the following commands in a fourth terminal:
ros2 run tf2_ros tf2_echo base_footprint map
If everything went well, you should now see the position of the robot on the map:
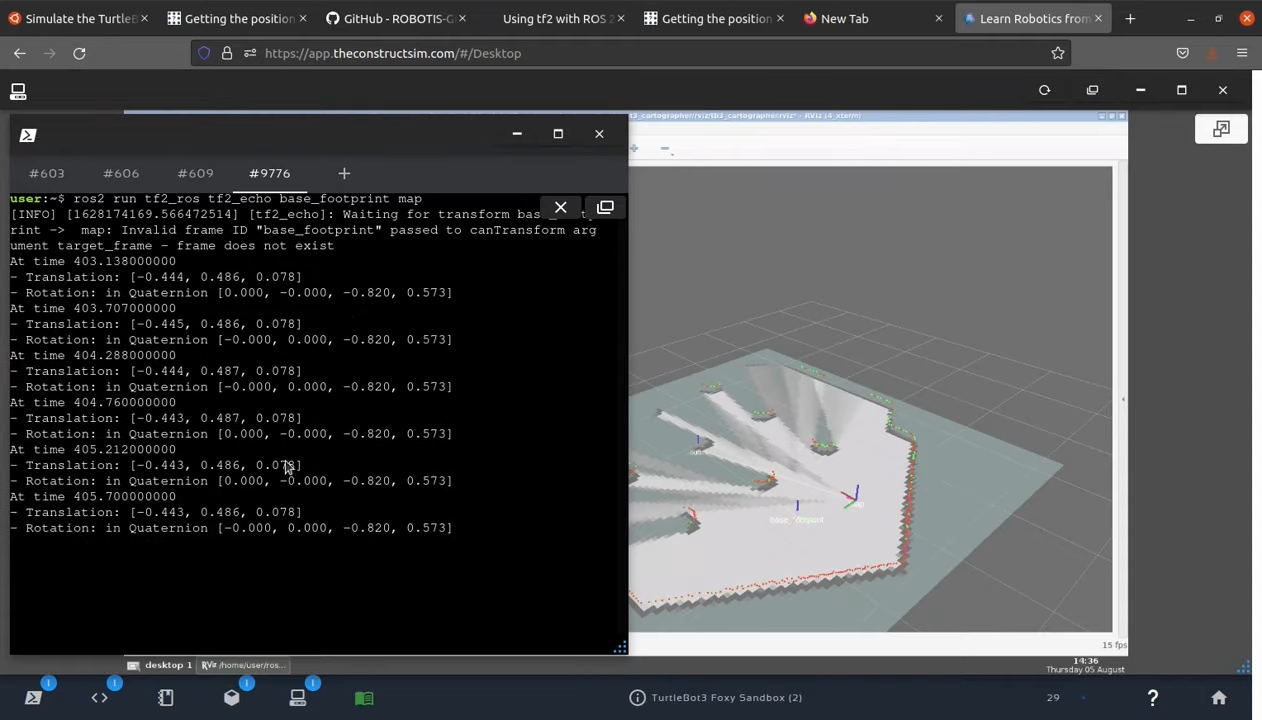
Position of the robot in the map
It is worth mentioning that you could also see how the position changed since the start by checking the /odom topic:
ros2 topic echo /odom
which would output something like:
---
header:
  stamp:
    sec: 134
    nanosec: 266000000
  frame_id: odom
child_frame_id: base_footprint
pose:
  pose:
    position:
      x: -2.0100126194480183
      y: -0.5015712387941228
      z: 0.008534903265552183
    orientation:
      x: -0.00010816129180871266
      y: 0.002866807007322309
      z: 0.054593061074308454
      w: 0.9985045655385131
  covariance:
  - 1.0e-05
  - 0.0
  - 0.0
  - 0.0
  - 0.0
  - 0.0
  - 0.0
  - 1.0e-05
  - 0.0
  - 0.0
  - 0.0
  - 0.0
  - 0.0
  - 0.0
  - 1000000000000.0
  - 0.0
  - 0.0
  - 0.0
  - 0.0
  - 0.0
  - 0.0
  - 1000000000000.0
  - 0.0
  - 0.0
  - 0.0
  - 0.0
  - 0.0
  - 0.0
  - 1000000000000.0
  - 0.0
  - 0.0
  - 0.0
  - 0.0
  - 0.0
  - 0.0
  - 0.001
twist:
  twist:
    linear:
      x: 3.0176329684333686e-06
      y: 5.2826723480558e-08
      z: 0.0
    angular:
      x: 0.0
      y: 0.0
      z: -6.792570267438341e-08
  covariance:
  - 1.0e-05
  - 0.0
  - 0.0
  - 0.0
  - 0.0
  - 0.0
  - 0.0
  - 1.0e-05
  - 0.0
  - 0.0
  - 0.0
  - 0.0
  - 0.0
  - 0.0
  - 1000000000000.0
  - 0.0
  - 0.0
  - 0.0
  - 0.0
  - 0.0
  - 0.0
  - 1000000000000.0
  - 0.0
  - 0.0
  - 0.0
  - 0.0
  - 0.0
  - 0.0
  - 1000000000000.0
  - 0.0
  - 0.0
  - 0.0
  - 0.0
  - 0.0
  - 0.0
  - 0.001
Youtube video
So this is the post for today. Remember that we have the live version of this post on YouTube. If you liked the content, please consider subscribing to our youtube channel. We are publishing new content ~every day.
Keep pushing your ROS Learning.


0 Comments