

Here you have an example of how to read the Pose of a robot in Python, answering a question made in ROS Answers
Q: Hello ! I want to know the pose of turtlebot (x,y,z, z rotation) respect to the point from which it started. What is the best way to do that in python?
A:Hello! As you suggest in your last message, the best practice for doing that is to use the odom topic. For that, you can create a simple subscriber in Python that gets the data you need, which is, position and orientation respect to an starting point. The code for a simple subscriber could be like this:
#! /usr/bin/env python

import rospy
from nav_msgs.msg import Odometry

def callback(msg):
    print msg.pose.pose

rospy.init_node('check_odometry')
odom_sub = rospy.Subscriber('/odom', Odometry, callback)
rospy.spin()
This code basically subscribes to the odom topic, and prints the pose component of the message, which contains the position and orientation values.
The following steps take throught the development as shown in the video.
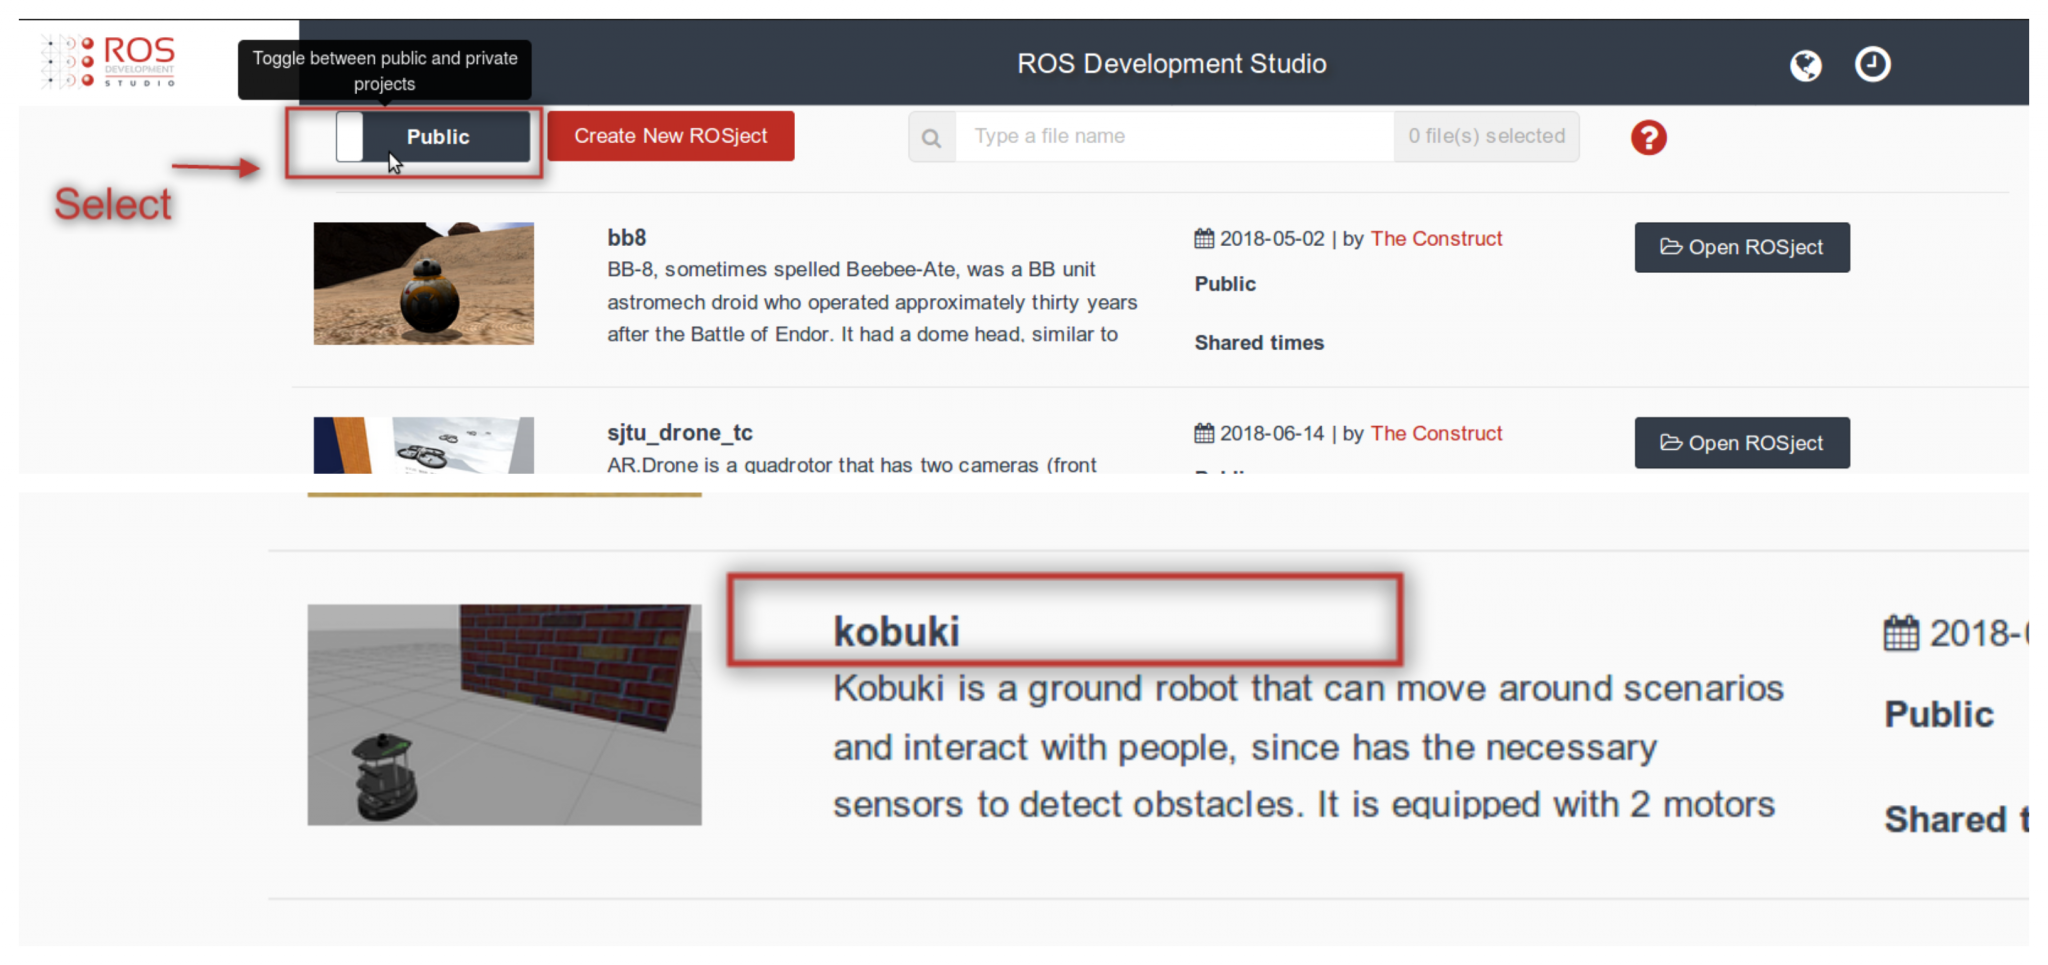
- Open Robot Development Studio and go to public projects.
- Select the Kobuki project and open it
$ rostopic list
Check for /odom topic in the output of the command. We can now check the information being published on this topic using the following command
$ rostopic echo /odom -n1
The output of the above command should be as shown in the image below (x≈0x≈0, y≈0y≈0)

- Next we will create a subscriber. Use the following commands to create a new package and a subscriber script file.
cd ~/catkin_ws/src catkin_create_pkg check_odometry cd check_odometry mkdir src launch
- Now we will create a script named inside the check_odometry/src/ directory. Add the following code to the script file
#!/usr/bin/env python

import rospy
from nav_msgs.msg import Odometry

def callback(msg):
    print(msg.pose.pose)

rospy.init_node('check_odometry')
odom_sub = rospy.Subscriber('/odom', Odometry, callback)
rospy.spin()
- We will now create a launch file with name inside the check_odometry/launch/ directory with the following content
<launch>
    <node pkg="check_odometry" type="check_odom.py" name="check_odometry" output="screen" />
</launch>
- Lets launch this launch file with the following command in SHELL
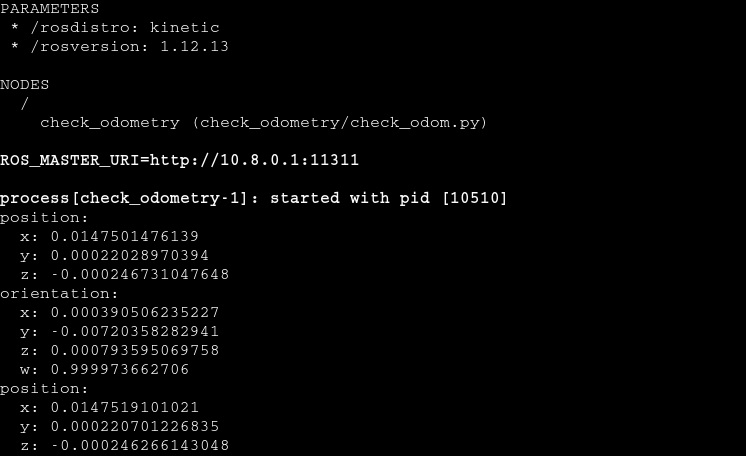
$ roslaunch check_odometry check_odom.launch
The above command should start publishing a stream of Odometry messages (the pose part) as shown in this image
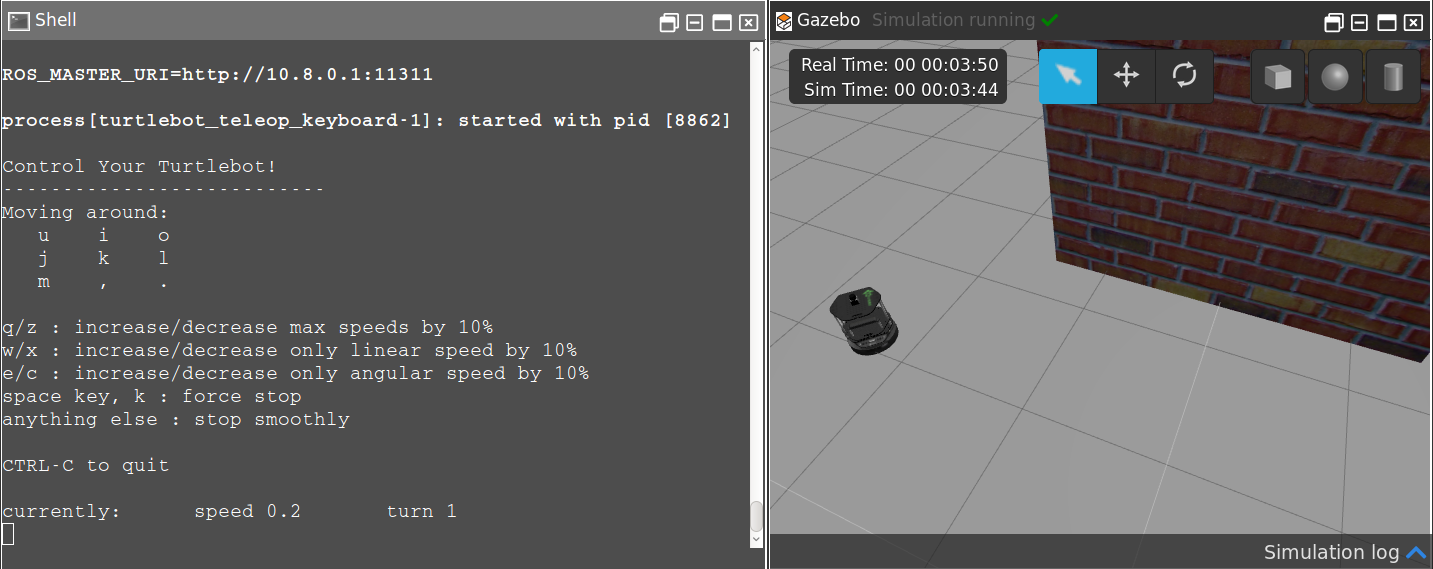
- Now let us move the robot slightly using the keyboard_teleop and observe the
/odommessage
$ roslaunch turtlebot_teleop keyboard_teleop.launch
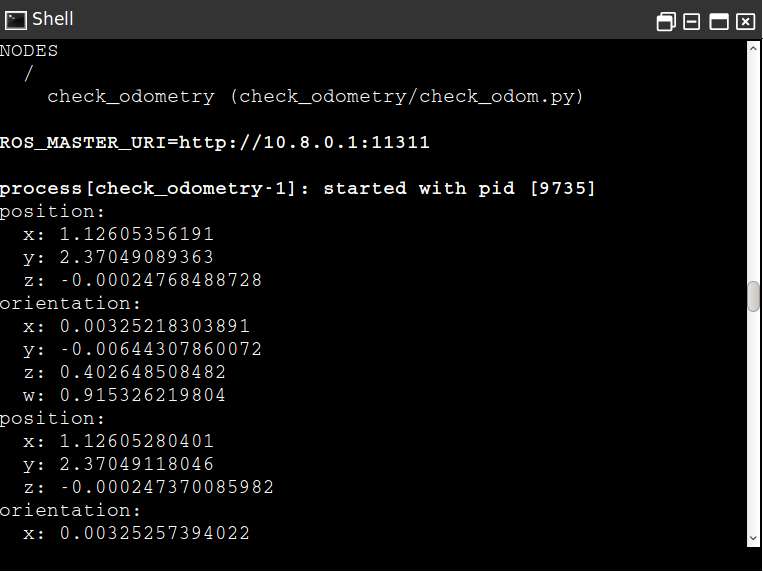
- Now we can start the launch file again see the change in the location of the robot
This finishes the steps in the Video tutorial.


Greetings,
fantastic tutorial for a newbie like me. I understood the script very well even though I’m new to Python and ROS. I do have a question though. What are those Linear and Angular values for twist output? Are they velocities? How can one get time also printed at the same time. That way one can plot the robot’s position with respect to time. Thanks in advance for your reply.
How to get robot position (x,y) in a map instead of Odometry in python?
https://answers.ros.org/question/341062/how-to-get-robot-position-xy-in-a-map-instead-of-odometry-in-python/