

In this video we are going to see how to convert a PointCloud into a laser scan. You can use later that laserscan as a lidar for robot navigation. This allows to do navigation with a very cheap sensor.
▸ Get the code of the video by clicking on this link: https://goo.gl/z3fNCs
(You need an account on ROSDS. Once you click on the link, the whole code will appear on your ROSDS account ready to use. Watch the video for additional instructions)
Below are the step by step instructions for creating the project on ROSDS.
NOTE: if you are not using the ROSDS and you are using your local ROS installation, then you need to have installed the ROS package PointCloud To LaserScan (find the link below in the related links section).
Step 1
Head to Robot Development Studio and create a new project
Provide a suitable project name and some useful description (we are using the name “pointcloud to laser”)
Open the project (this will take few seconds)
Once the project is loaded run the IDE from the tools menu. Also verify that the inital directory structure should look like following
.
├────── ai_ws
├────── catkin_ws
│     ├─── build
│     ├─── devel
│     └───
├────── notebook_ws
│     ├─── default.ipynb
│     └─── images
└────── simulation_ws
      ├─── build
      ├─── devel
      └─── src
Step 2
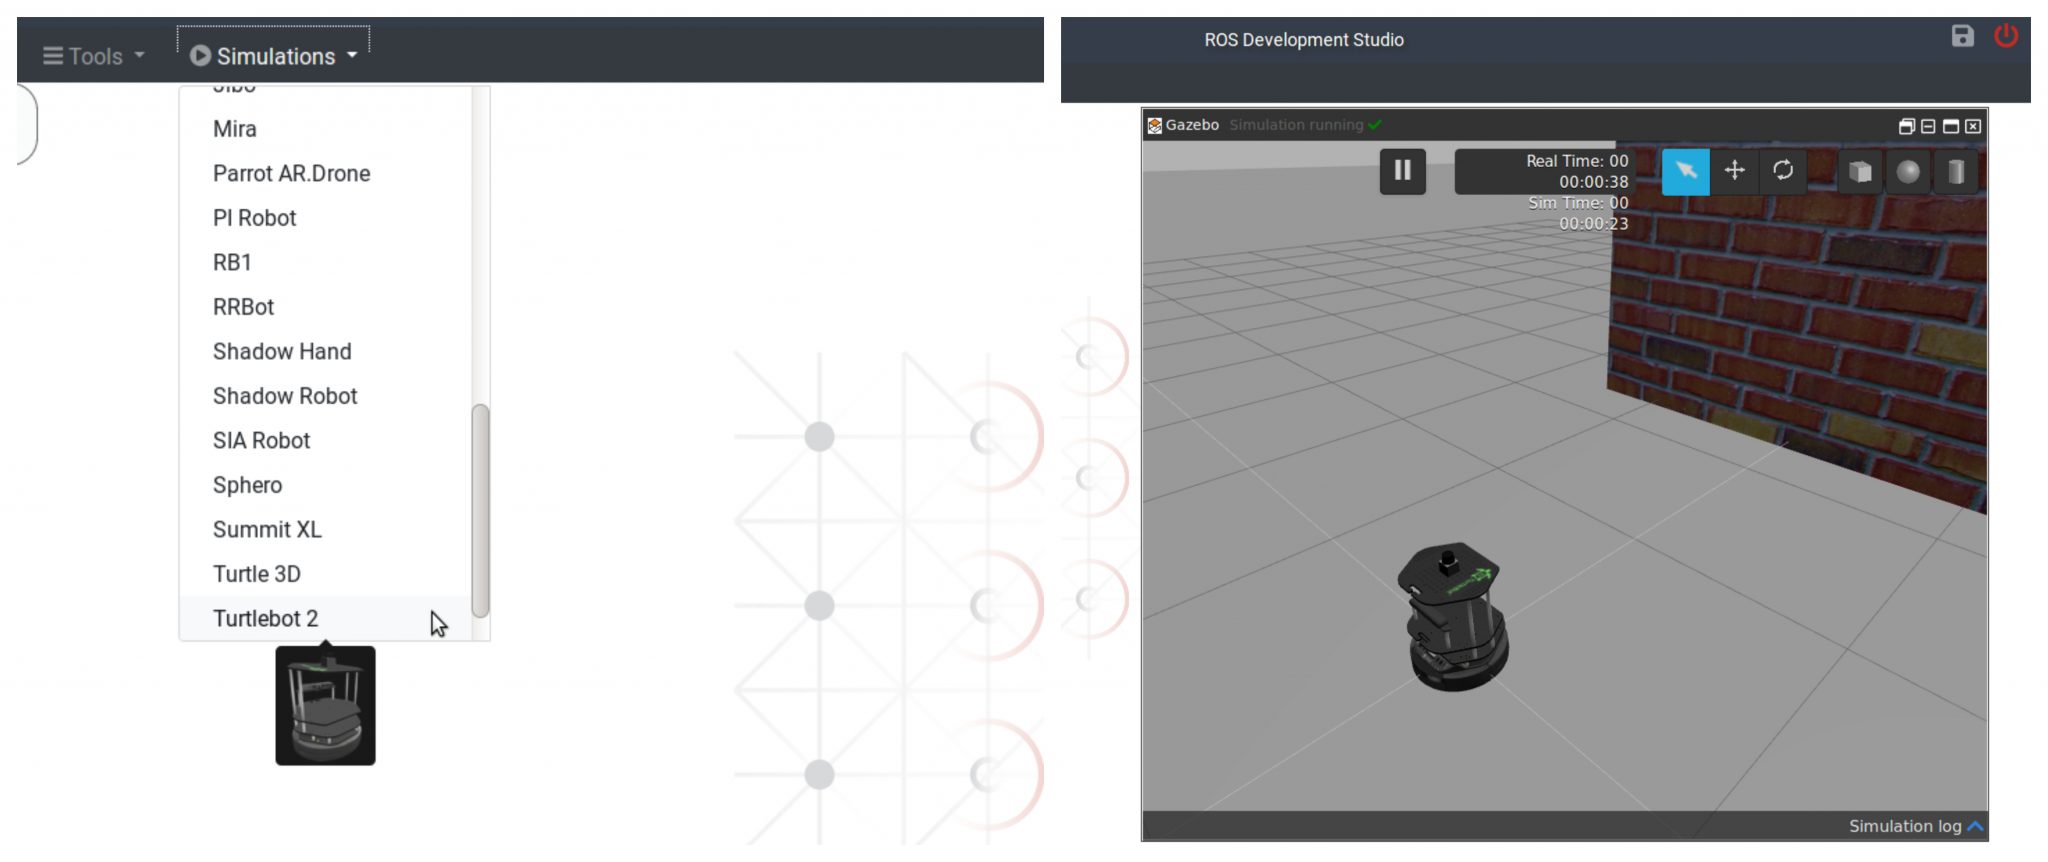
Simulate a turtlebot2 by choosing Turtlebot 2 option in the Simulation menu.
Next we will create a package pc2l (stands for PointCloud2Laser). Open a shell, browse to ~/catkin_ws/src directory and create a package with name pc2l
$ cd ~/catkin_ws/src
$ catkin_create_pkg pc2l
Further, we need to create a launch file that will create a node to do the conversion of pointcloud data to laser scan data (using pointcloud_to_laserscan library). We will create a launch directory then a launch file by name start.launch. We can use the IDE tool to achieve the same
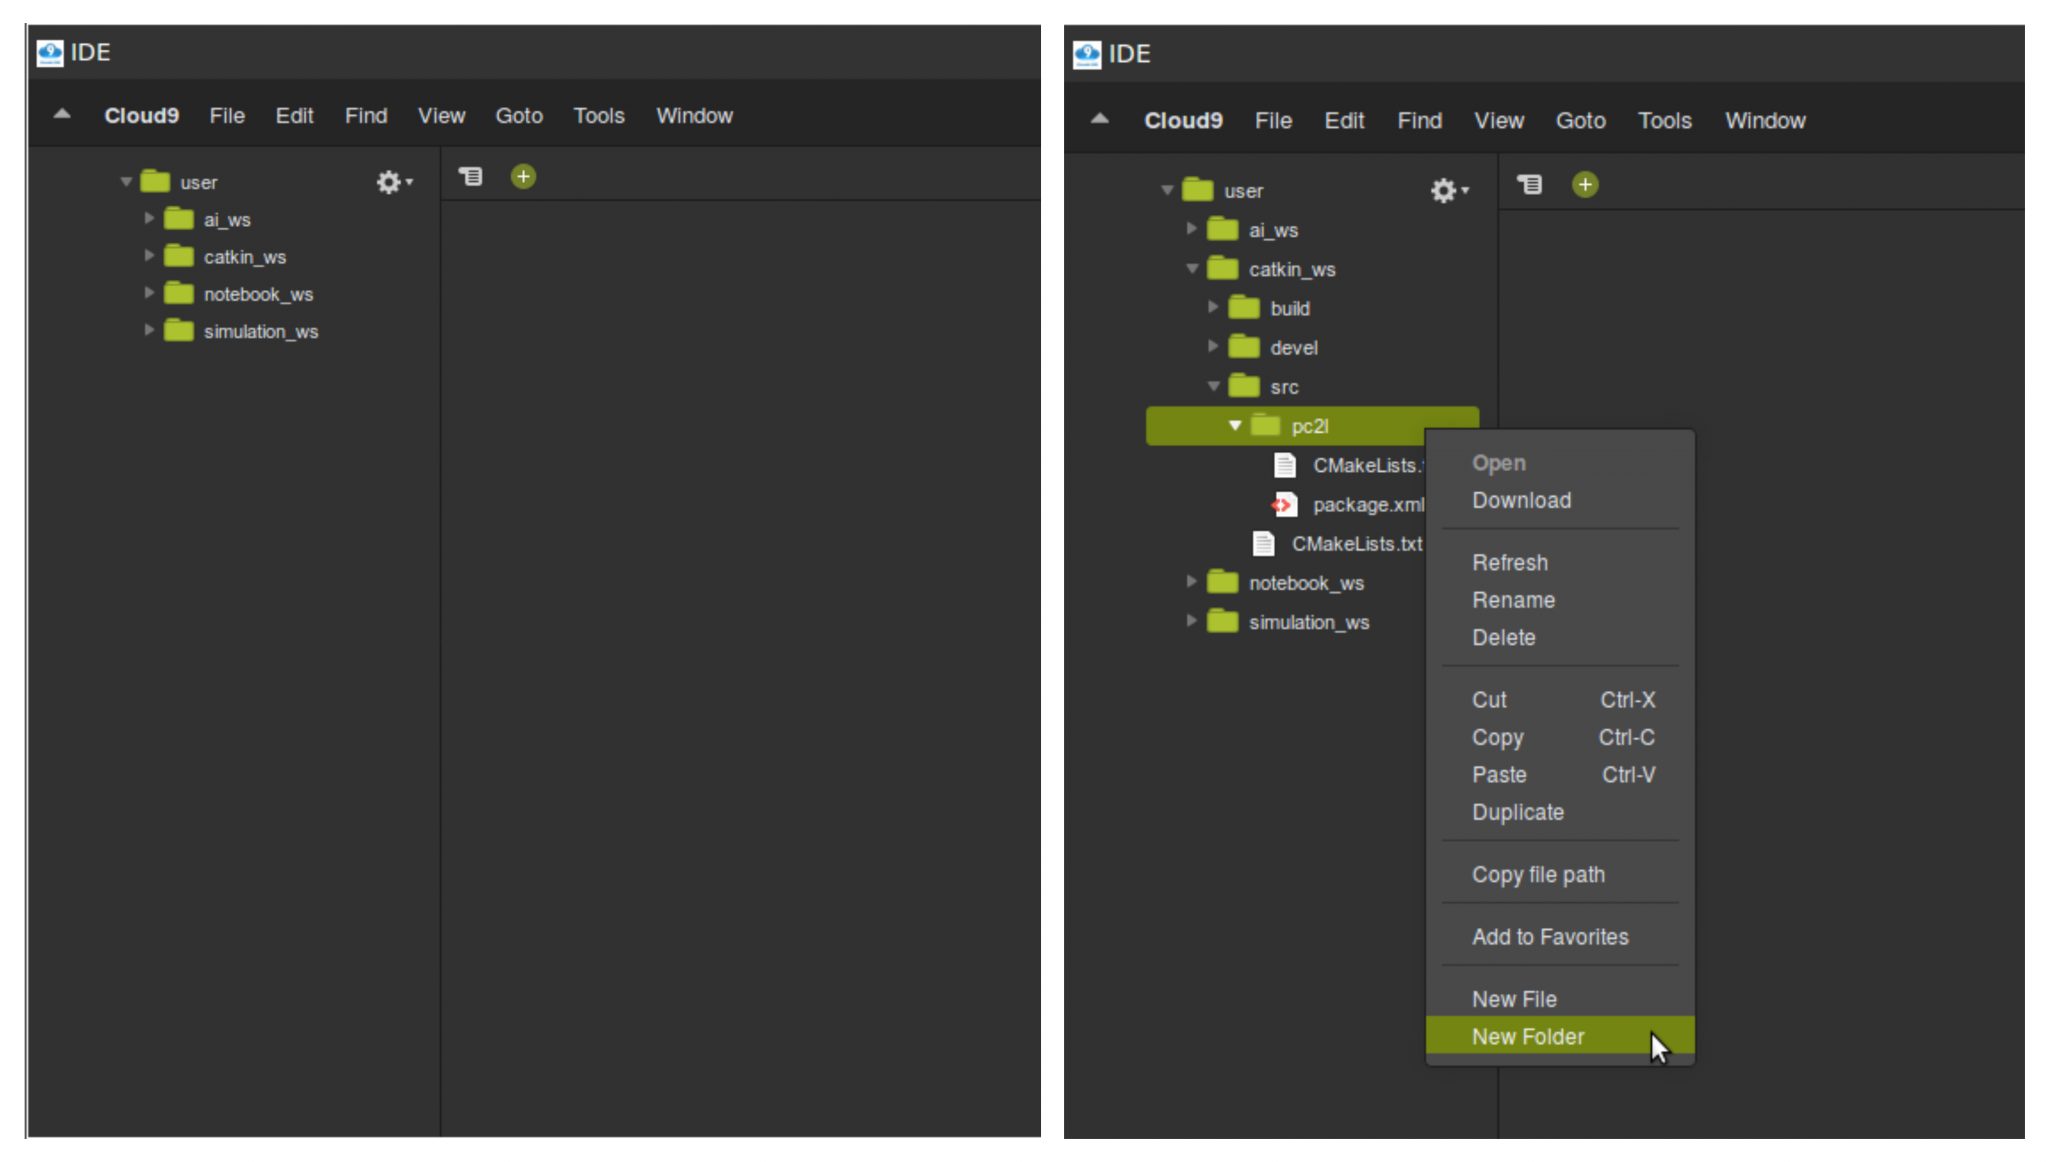
Create a new file (inside the launch folder) with name start.launch and input the following contents (Note: The pointcloud_to_laserscan library needs to be installed in the system)
<launch>
    <node pkg="pointcloud_to_laserscan" type="pointcloud_to_laserscan_node" name="pointcloud_to_laserscan">
      <remap from="cloud_in" to="/camera/depth/points"/>
      <remap from="scan" to="/camera/scan" />
      <rosparam>
        target_frame: camera_link
        transform_tolerance: 0.01
        min_height: 0.0
        max_height: 1.0

        angle_min: -1.5708
        angle_max: 1.5708
        angle_increment: 0.0087
        scan_time: 0.3333
        range_min: 0.45
        range_max: 4.0
        use_inf: true

        #concurrency_level affects number of pc queued for processing and the number of threadsused
        # 0: Detect number of cores
        # 1: Single threaded
        # 2: inf : Parallelism level
        concurrency_level: 1
      </rosparam>
    </node>
</launch>
This **launch file** set’s up various parameters which are briefed below:
cloud_in : This argument contains the name of the topic that is publishing the pointcloud data.
scan : This argument contains topic name (created by pointcloud_to_laserscan) that contains the converted scan data.
target_frame : Tells the frame of reference for laser scan
min and max height : Define the height range which will be taken into account while converting the pointcloud
min and max angle : Define the range of angle over which laser scan data is composed about
angle increment : The step increase in angle between conscuting scans
scan time : The scan time is the interval between publishing two scans
min and max range : This arguments defines the range of distance captured in the scans
use inf : A point detected further than max range is encoded as inf point
concurrency : This parameters controls how much cpu you want to allocate to the pointcloud to laser scan processing
Step 3
Now we can run the launch file, visualize the data (laser scan) and compare the pointcloud converted laser scan data with laser scan data provided by a laser scanner mounted on the robot.
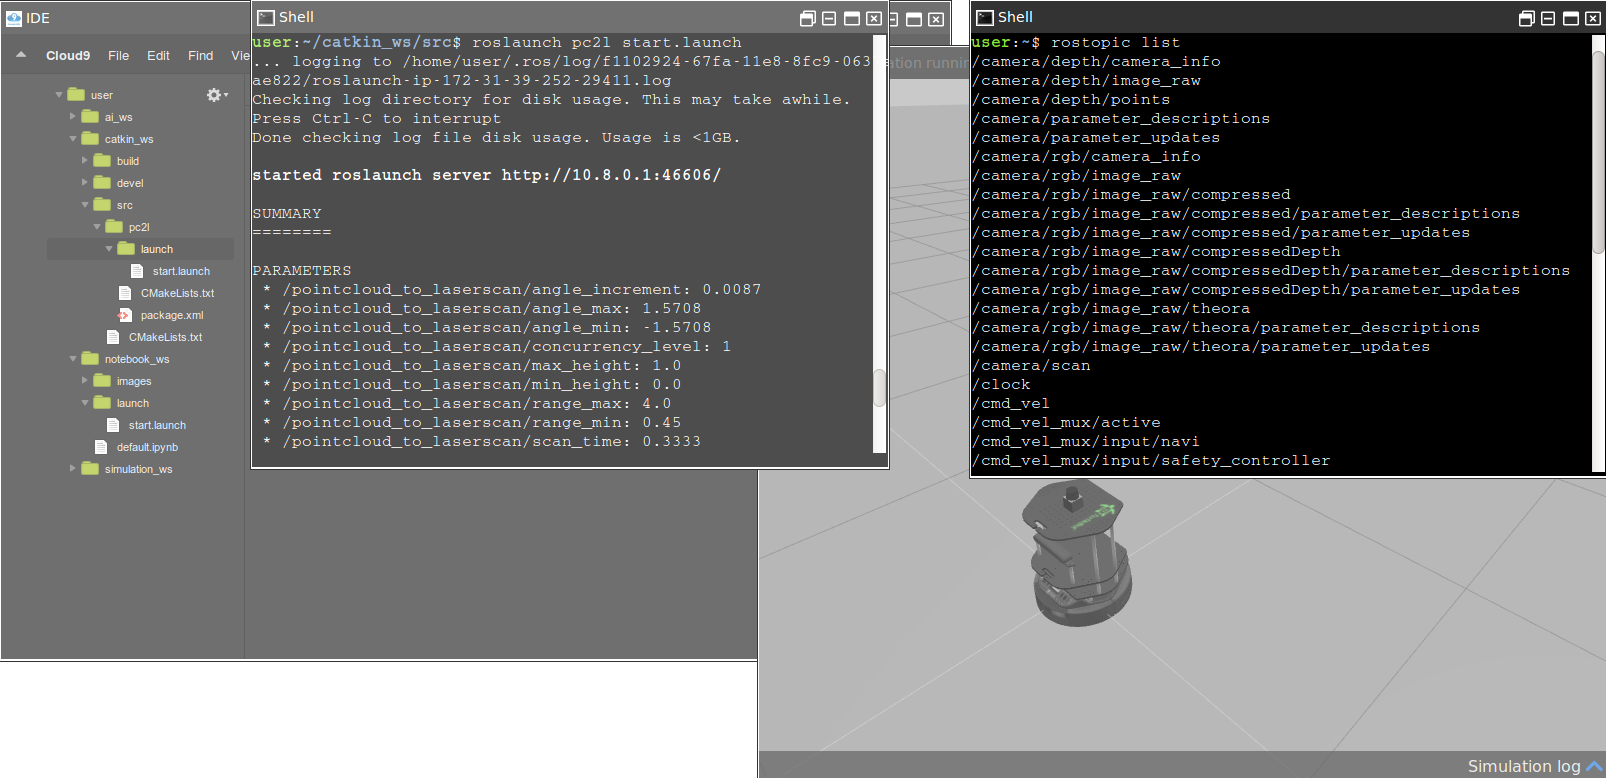
In the Shell type the following command to run the launch file
$ roslaunchg pc2l start.launch
This command will start a new topic with name /camera/scan. To verify start a new Shell and run the command
$ rostopic list
To visualize the data published over the /camera/scan topic we will run rviz In the shell, type the following command
$ rosrun rviz rviz
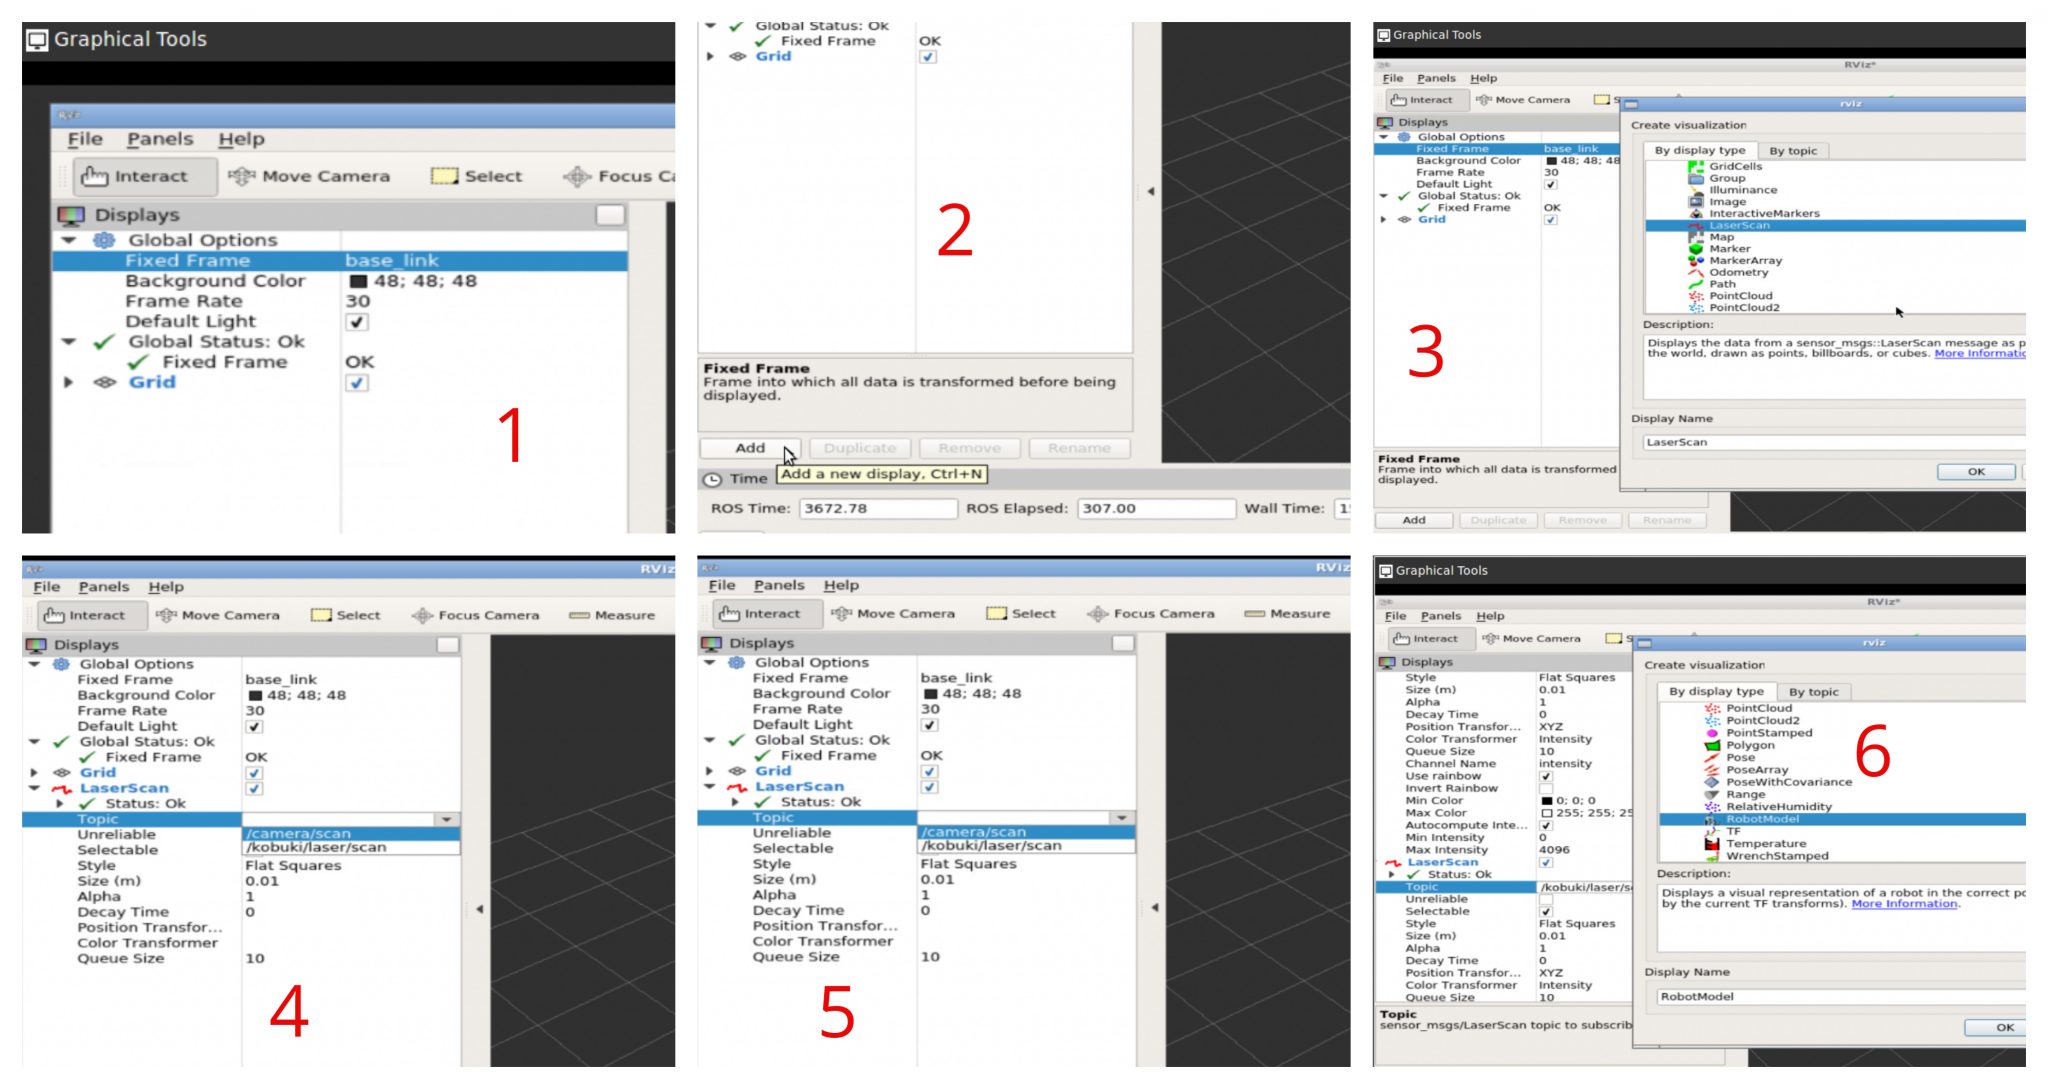
To see the rviz window we require a Graphical Tool
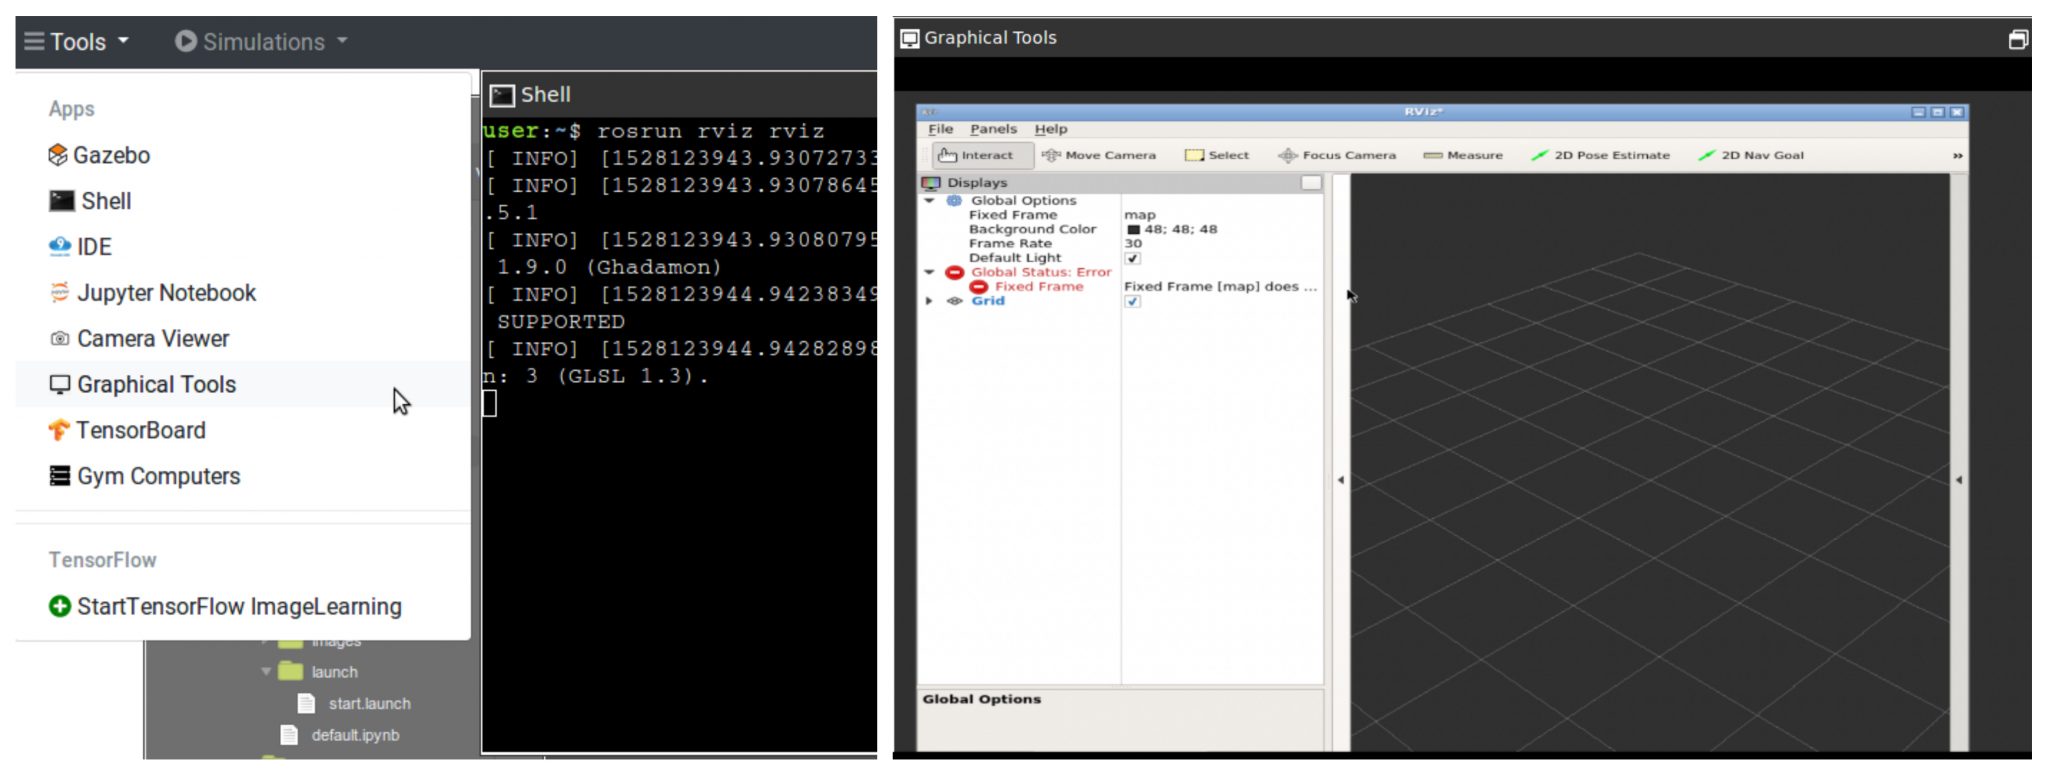
Once the rviz loads we will fix the errors by choosing appropriate value for Fixed Frame parameter. Then we will add following new displays
- Laser display 1 : We will select the topic /camera/scan
- Laser display 2 : We will select the topic /kobuki/laser/scan
- Robot Model : We will add a robot model to visualize a turtlebot inside the rviz window
After we are done with all settings we will see the following
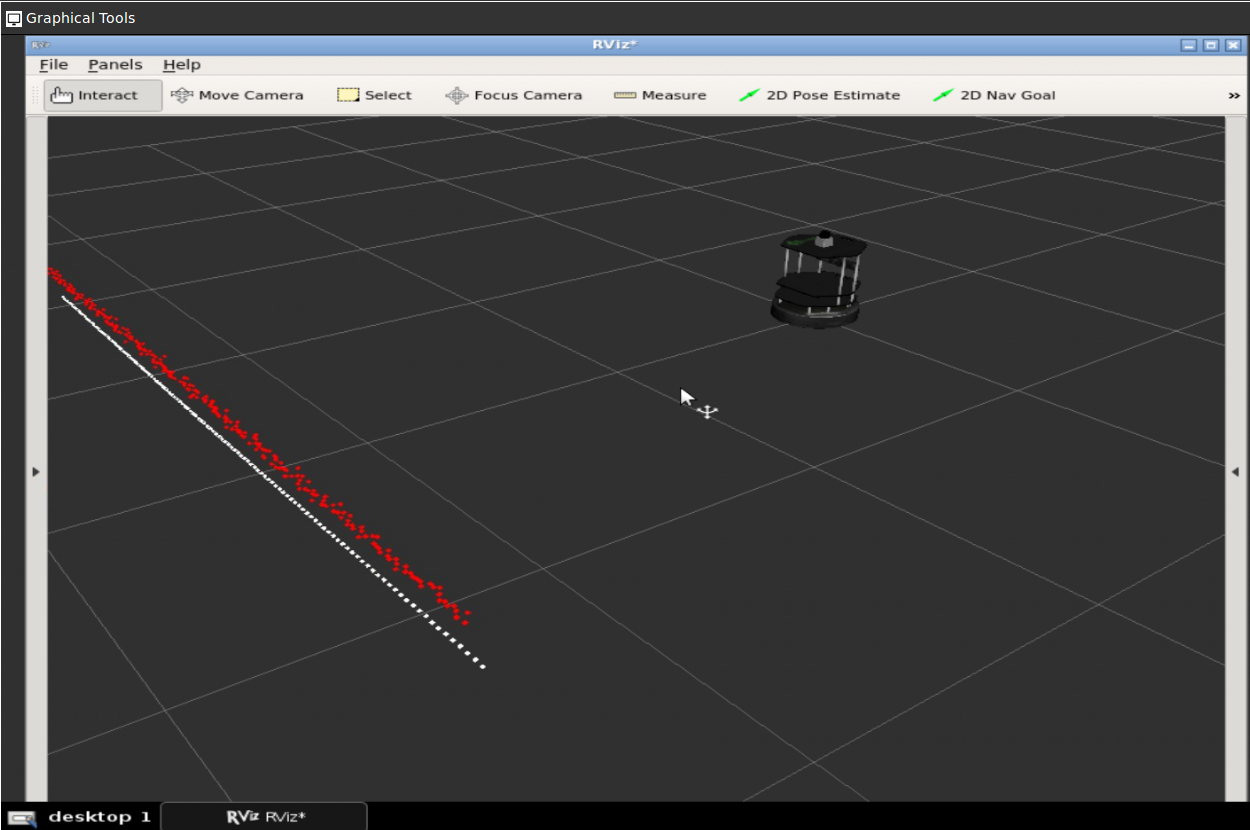
There are two laser scans one is from the /camera/scan (white colored) and the other is from /kobuki/laser/scan. We are done at this point.
// RELATED LINKS
▸ Point Cloud To LaserScan ROS package: http://wiki.ros.org/pointcloud_to_laserscan
▸ ROS Development Studio: https://goo.gl/tnjCD5
▸ Robot Ignite Academy: https://goo.gl/8EhkWn
▸ ROS Navigation in 5 days online course: https://goo.gl/mkRYiR


Hi,
I have tried to do this with the WAM-V USV which gives me PointCloud2 data from the /lidar_wamv/points
I have followed the steps in this tutorial and I am not able to get any laser scan data. May I check if its the same from PointCloud2 to Laser scan or do I have to convert from PC2 to PC before applying what is in this tutorial?
Thank you very much!
Regards,
Kelvin
You should change launch file like below.
Sorry I couldn’t send content because of spam block.
In launch file
nodepkg=”pointcloud_to_laserscan” type=”pointcloud_to_laserscan_node” name=”pointcloud_to_laserscan_node”