")

What we are going to learn
- How to use Webots with ROS2
List of resources used in this post
- Use the rosject: https://app.theconstructsim.com/l/5020588f/
- Webots Simulator: https://github.com/cyberbotics/webots
- Webots documentation: https://cyberbotics.com/doc/guide/index
- The Construct: https://app.theconstructsim.com/
- ROS2 Courses –▸
- ROS2 Basics in 5 Days (Python): https://app.theconstructsim.com/#/Course/73
- ROS2 Basics in 5 Days (C++): https://app.theconstructsim.com/#/Course/61
- ROS2 Navigation training: https://www.theconstruct.ai/ros2-navigation-training/
Overview
In this post, we will learn how to use a simulator other than Gazebo in ROS. We are going to use the Webots Simulator, whose code is available at https://github.com/cyberbotics/webots
ROS Inside!
ROS inside
Before anything else, in case you want to use the logo above on your own robot, feel free to download it for free and attach it to your robot. It is really free. Find it in the link below:
Opening the rosject
In order to work with Webots with ROS 2, we need to have ROS2 installed in our system, and ideally a ros2_ws (ROS2 Workspace). To make your life easier, we already prepared a rosject with a simulation for that: https://app.theconstructsim.com/l/5020588f/.
You can download the rosject on your own computer if you want to work locally, but just by copying the rosject (clicking the link), you will have a setup already prepared for you.
After the rosject has been successfully copied to your own area, you should see a Run button. Just click that button to launch the rosject (below you have a rosject example).

Learn ROS2 Topics vs Service vs Action – Run rosject (example of the RUN button)
After pressing the Run button, you should have the rosject loaded. Let’s now head to the next section to really get some real practice.
Opening the Code Editor
Let’s start by opening the Code Editor by clicking on the second link:
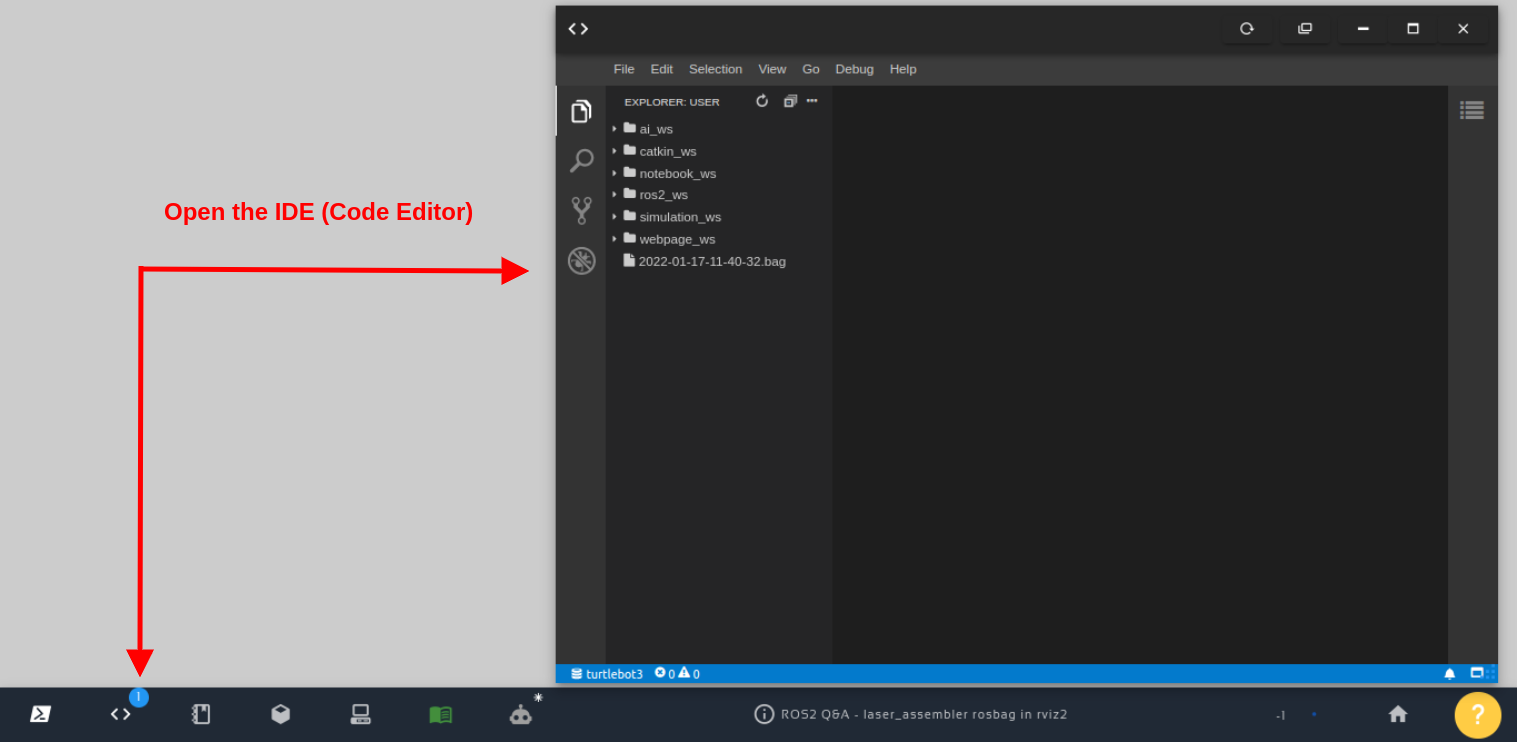
Open the IDE – Code Editor
Once the Code Editor is open, you should be able to see that we have the webots folder in the root.
That folder contains the Webots version R2022b compiled from source.
If you are really new to Webots, you can follow the complete guide available at https://cyberbotics.com/doc/guide/index.
Starting Webots Simulator
In order to start Webots using the command line, let’s start by opening a terminal:
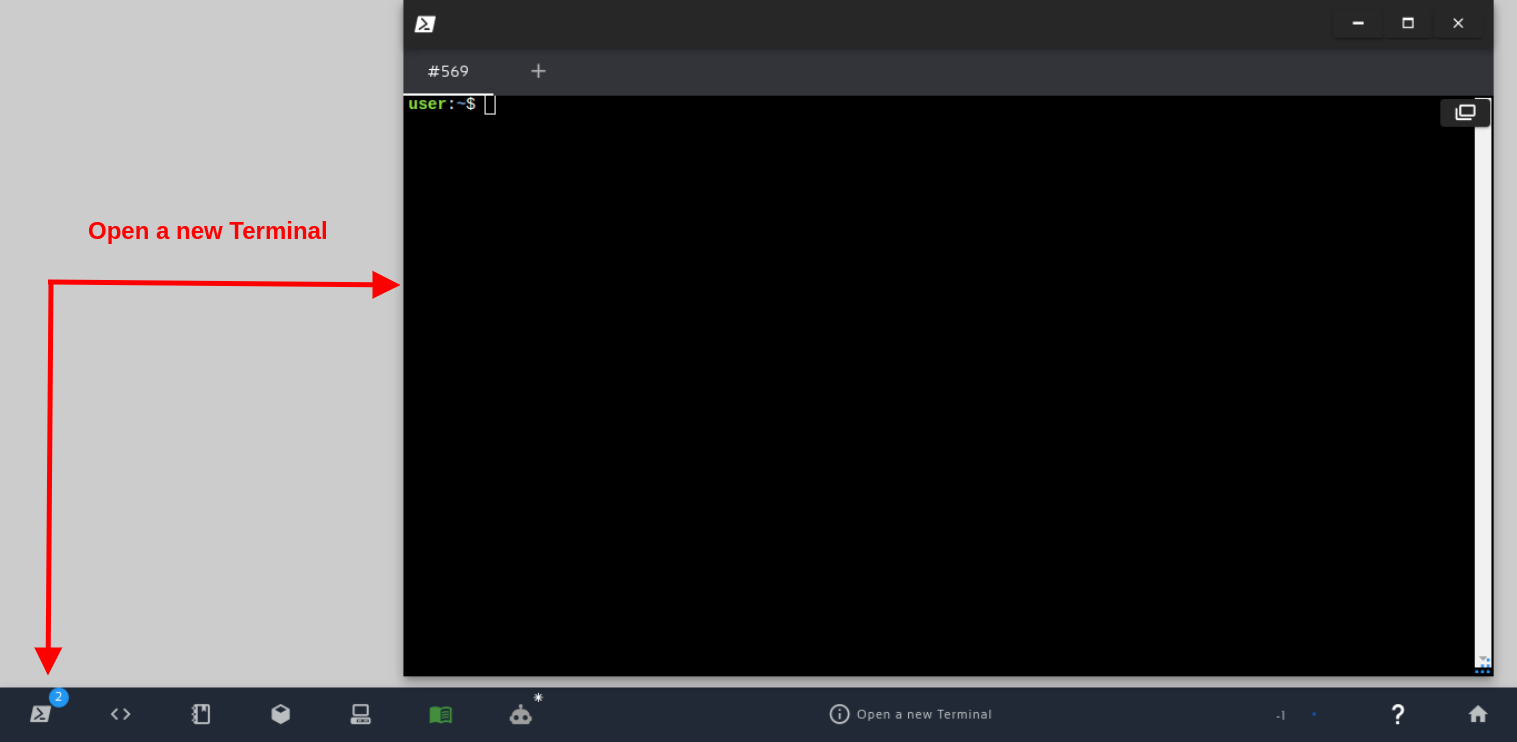
Open a new Terminal
Now, to open Webots we only need the two following commands:
cd ~/webots

./webots
After a few seconds, you should have a pop-up with a Webots ROS2 Simulation (by default it shows the last simulation we used). If the pop-up doesn’t open, you can have it by clicking on the 4th Icon of the bottom bar.
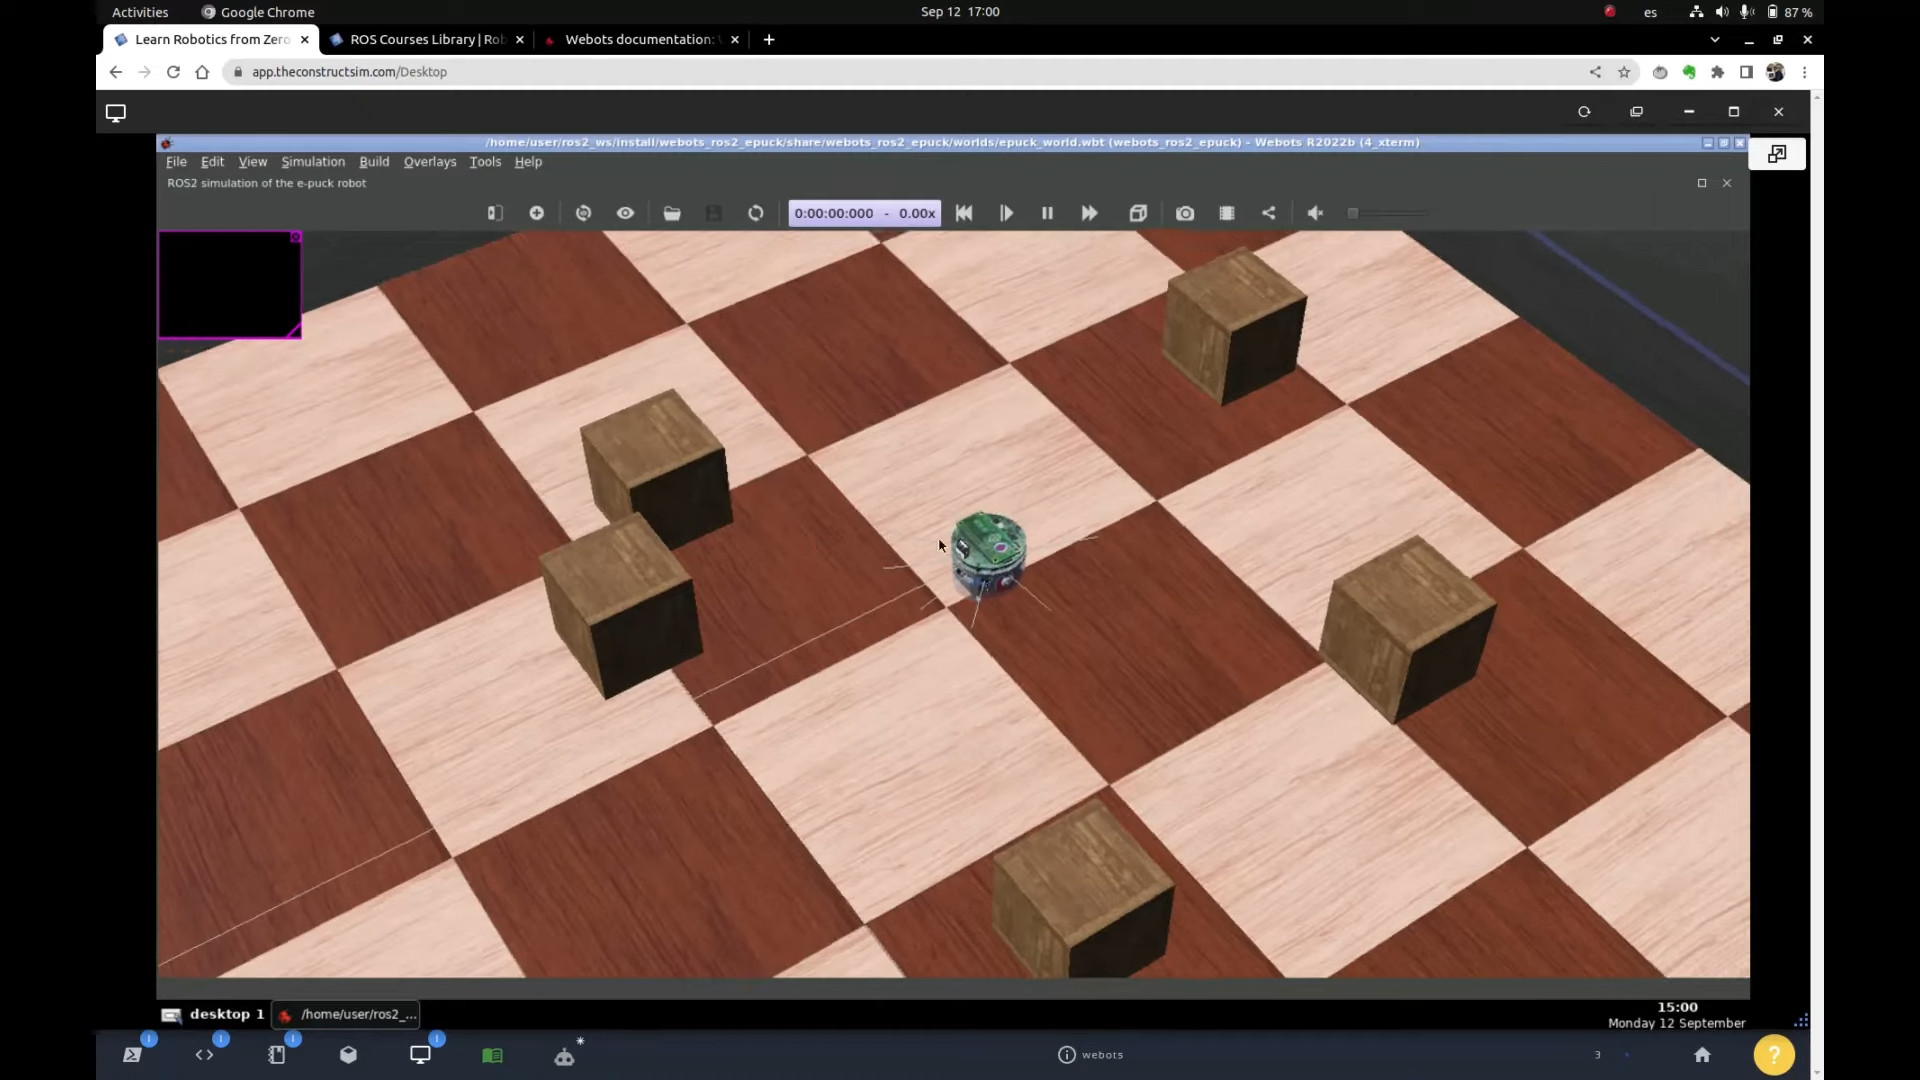
Webots ROS2 Simulation
Ok, now that you know how to open Webots manually, feel free to close the simulator by pressing CTRL+C on the command line, or manually pressing the Close Webots button available on the top right corner of the simulator.
Launching a Webots world
As you may have noticed, we have a workspace named ros2_ws. That workspace contains ROS2 packages ready for Webots.
Let’s launch a simulation using the following command:
ros2 launch webots_ros2_epuck robot_launch.py
That command will basically load the world that we saw in the previous picture.
You can now go to a second terminal and check the topics with:
ros2 topic list
If you want to move a robot, you would need external controllers, but that is a topic for another post.
In any case, you can always refer to the official documentation. For External Controllers, the documentation is available at https://cyberbotics.com/doc/guide/running-extern-robot-controllers?tab-os=linux
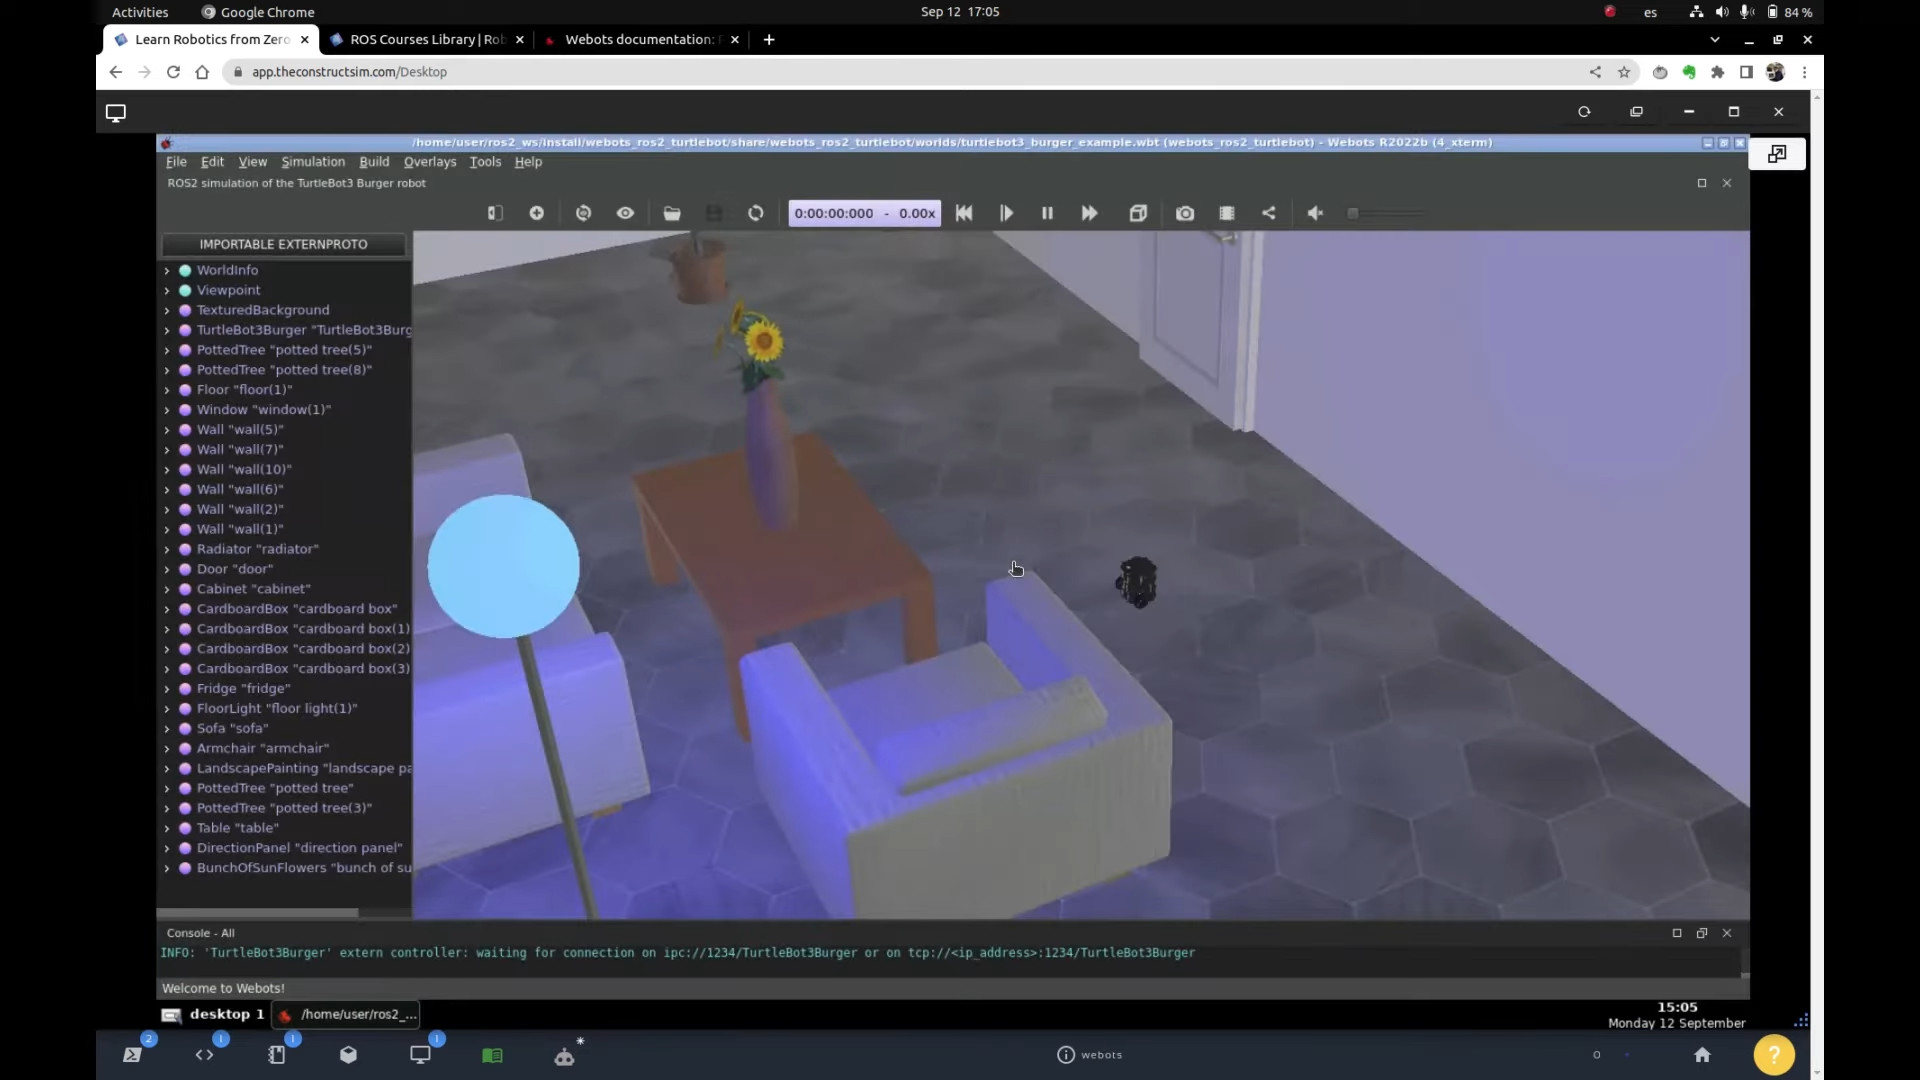
Another simulation you could launch with Webots is Turtlebot:
ros2 launch webots_ros2_turtlebot robot_launch.py
It may take a while to load because Webots downloads the assets in the background. But after a while, you should have the Turtlebot simulation up and running:
You can list the ros2 topics just as you did for the previous simulation:
ros2 topic list
You can even load a Tesla simulation with Webots, in which you have a Tesla in a city:
ros2 launch webots_ros2_turtlebot robot_launch.py

Testa Simulation in Webots
Webots guided tour
You can also follow the Webots Guided Tour by clicking Help -> Webots Guided Tour, although most of the tours right now are still for ROS (ROS1).
Congratulations. You have just learned the basics of how to start a Webots simulation using ROS2. We hope this post was really helpful to you. If you want a live version of this post, please check the video in the next section.
Youtube video
So this is the post for today. Remember that we have the live version of this post on YouTube. If you liked the content, please consider subscribing to our youtube channel. We are publishing new content ~every day.
Keep pushing your ROS Learning.
Related Courses & Training
If you want to learn more about ROS and ROS2, we recommend the following courses:
- ROS2 Basics in 5 Days (Python): https://app.theconstructsim.com/#/Course/73
- ROS2 Basics in 5 Days (C++): https://app.theconstructsim.com/#/Course/61

0 Comments