

What we are going to learn
- How to create a new release repository
- How to create a new release team
- How to install the tools that you will use
- How to create a Personal Access Token on GitHub
List of resources used in this post
- Use the rosject: https://app.theconstructsim.com/l/4f2b155e/
- The Construct: https://app.theconstructsim.com/
- ROS 2 Documentation: https://docs.ros.org/en/humble/How-To-Guides/Releasing/Releasing-a-Package.html
- ROS2 basic Courses –▸
- ROS2 Basics in 5 Days (Python): https://app.theconstructsim.com/Course/73
- ROS2 Basics in 5 Days (C++): https://app.theconstructsim.com/Course/61
- ROS2 Basics in 5 Days Galactic (C++): https://app.theconstructsim.com/Course/117
Overview
ROS2, the improved version of ROS (ROS1), is quickly becoming the standard for developing robotics applications.
In this post, we will learn how to release a ROS2 package as a binary file. Binary files are pre-built executables. They are easier to install because they do not require building from the source code. Binary files are perfect if you want to easily distribute a package to other people.
You can easily install them with apt-get install PKG_NAME, or sudo dpkg -i pkg-name.deb, for example.
This is the first post in a series of two posts.
The second post can be found at:
ROS Inside!

ROS inside
Before anything else, in case you want to use the logo above on your own robot, feel free to download it for free and attach it to your robot. It is really free. Find it in the link below:
Acknowledgment
This post is based on ROS2’s official documentation, check it out here:
https://docs.ros.org/en/humble/How-To-Guides/Releasing/Releasing-a-Package.html
Opening the rosject
In order to release a ROS 2 binary package, we need to have ROS2 installed in our system, and it is also useful to have some simulations. To make your life easier, we already prepared a rosject with a simulation for that: https://app.theconstructsim.com/l/4f2b155e/.
You can download the rosject on your own computer if you want to work locally, but just by copying the rosject (clicking the link), you will have a setup already prepared for you.
After the rosject has been successfully copied to your own area, you should see a Run button. Just click that button to launch the rosject (below you have a rosject example).

How to release a ROS 2 binary package – Run rosject (example of the RUN button)
After pressing the Run button, you should have the rosject loaded. Let’s now head to the next section to really get some real practice.
Assumptions
We assume you have a GitHub account. If you don’t have it yet, you can easily create it by following this link: https://github.com/signup
Creating a ‘release repository’
When a release process runs, it outputs files for instance .md and .yaml files. This output is known as release artifacts. In ROS2, these artifacts need to be stored in a separate repository from the source code files. This repository is what we call the release repository.
So, if your repository name is wall_follower_ros2, you have to create a new repository that you can call, for instance, wall_follower_ros2-release to be used as a release repository for your package.
The ROS2 release process will use that repository to store artifacts as the automated release process runs.
You can leave the repository Public, and hit the “Create repository” button.
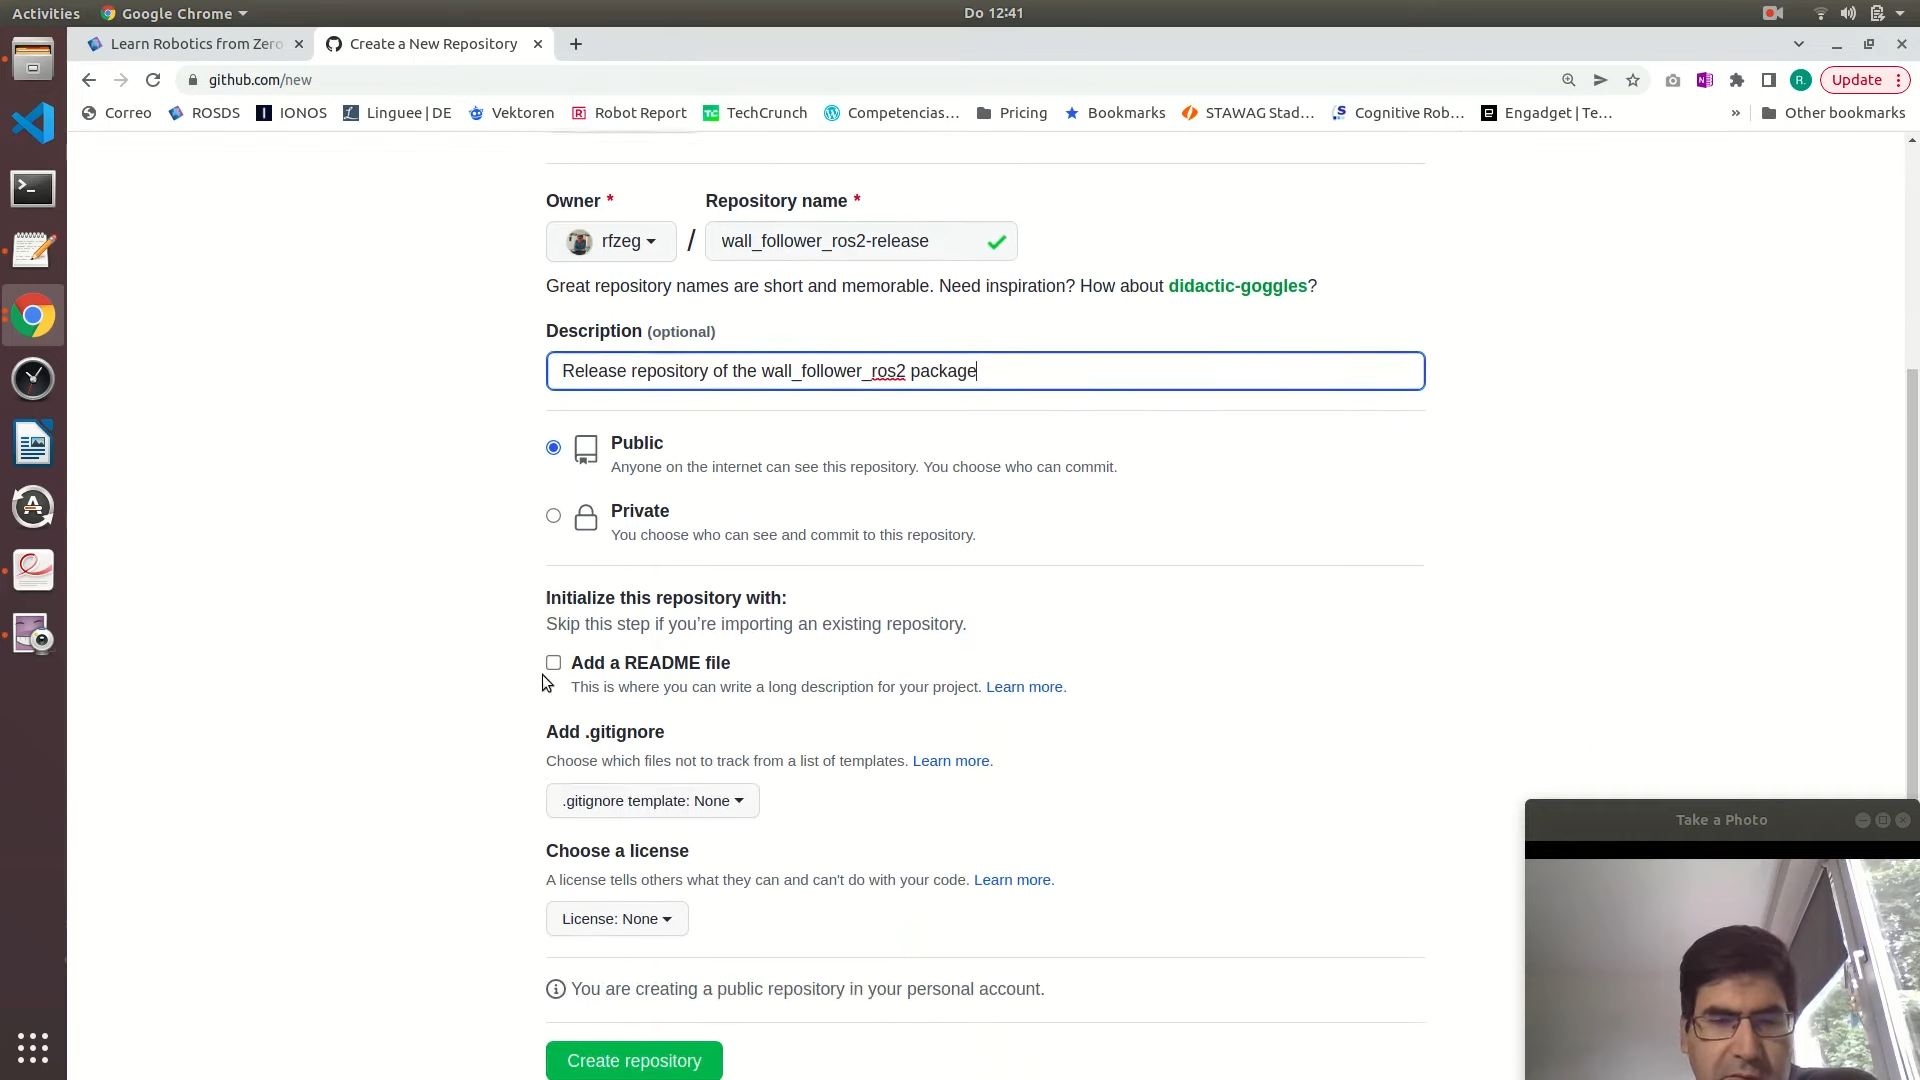
Creating a release package on GitHub
Start a new release team
A release team is a group of users within an organization who has permission to manage all release operations.
If a release team exists in your organization, you can join that team by completing the Update Release Team Membership issue template.
This form will allow you to create a new release team and add the release repository to your new team in one go.
Below we have an example of the New Release Team issue filled:
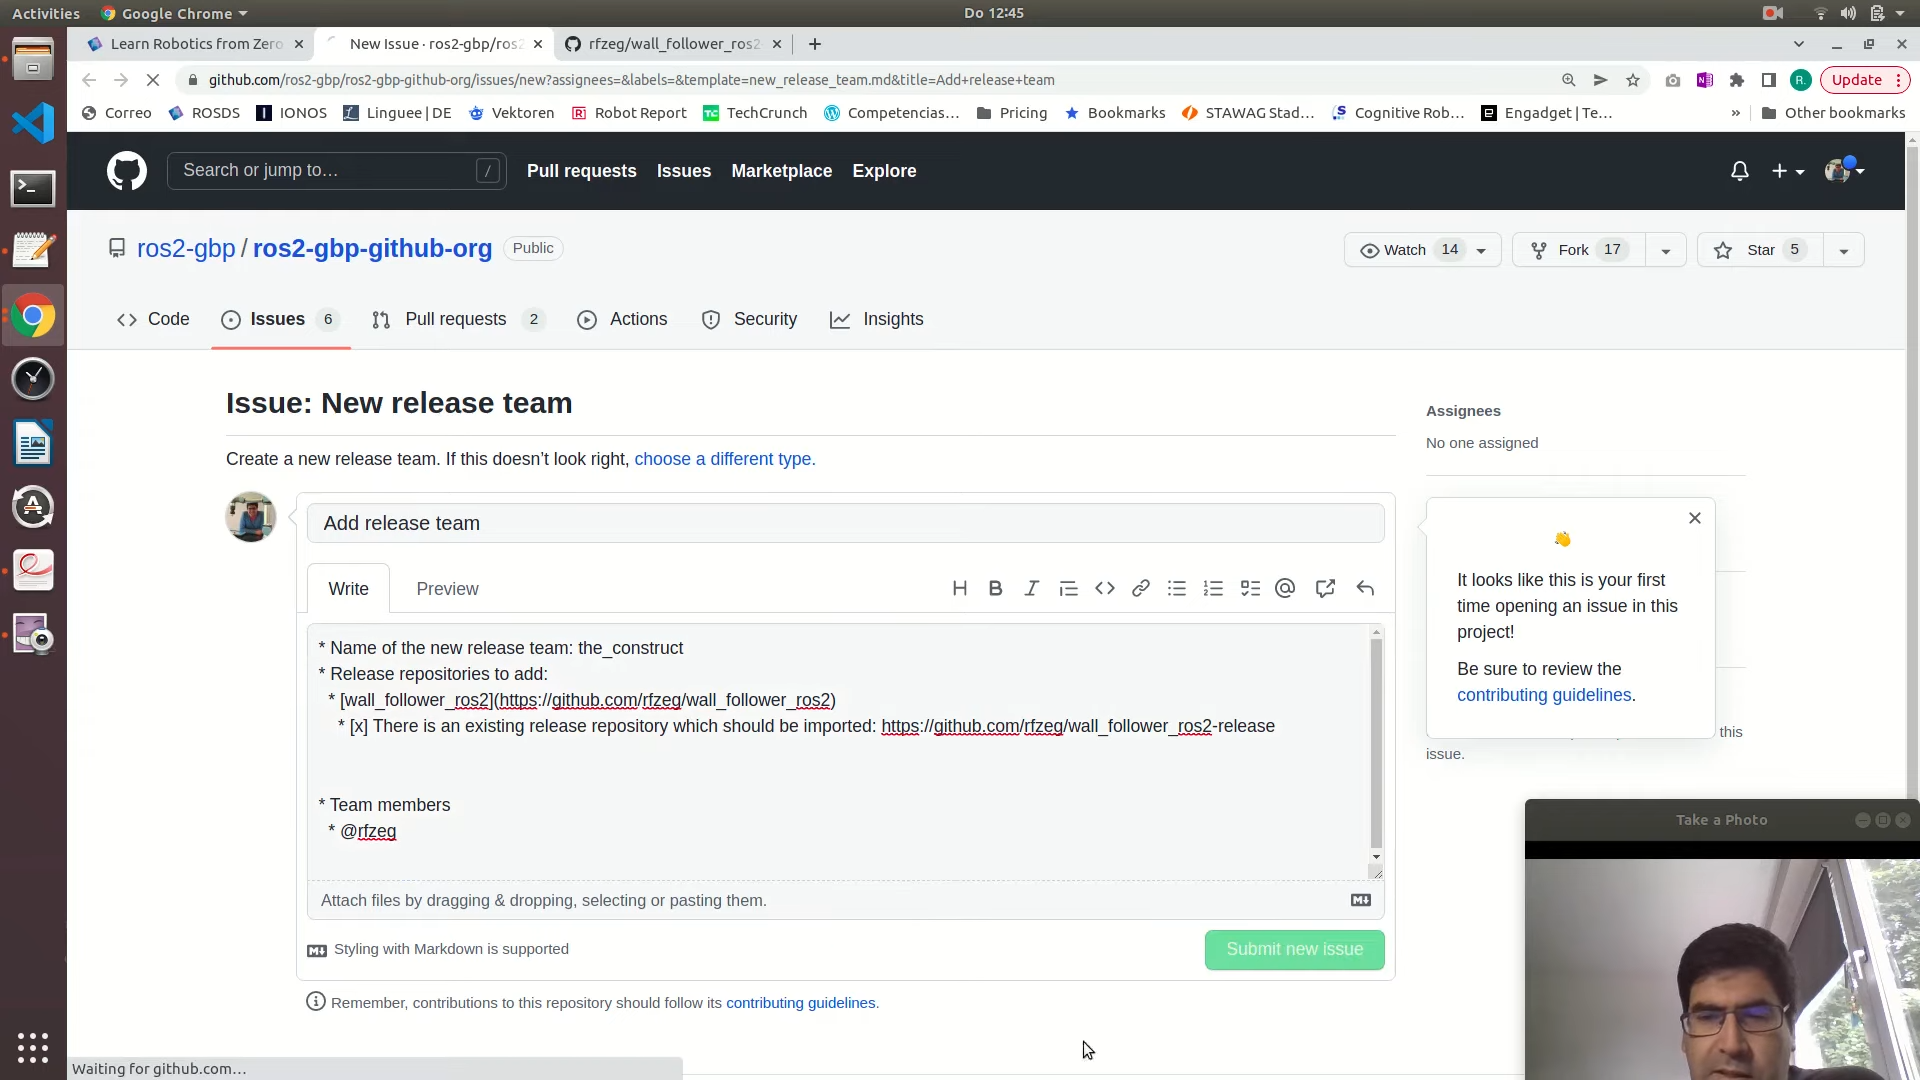
Starting a new ros2 release team on GitHub
After creating the issue, you submit it and wait for the ROS2 team to take it into account.
Installing the tools required on your machine
In order to install the required tools, we need to have a terminal. If you are on The Construct, after having opened a rosject, let’s open a terminal:
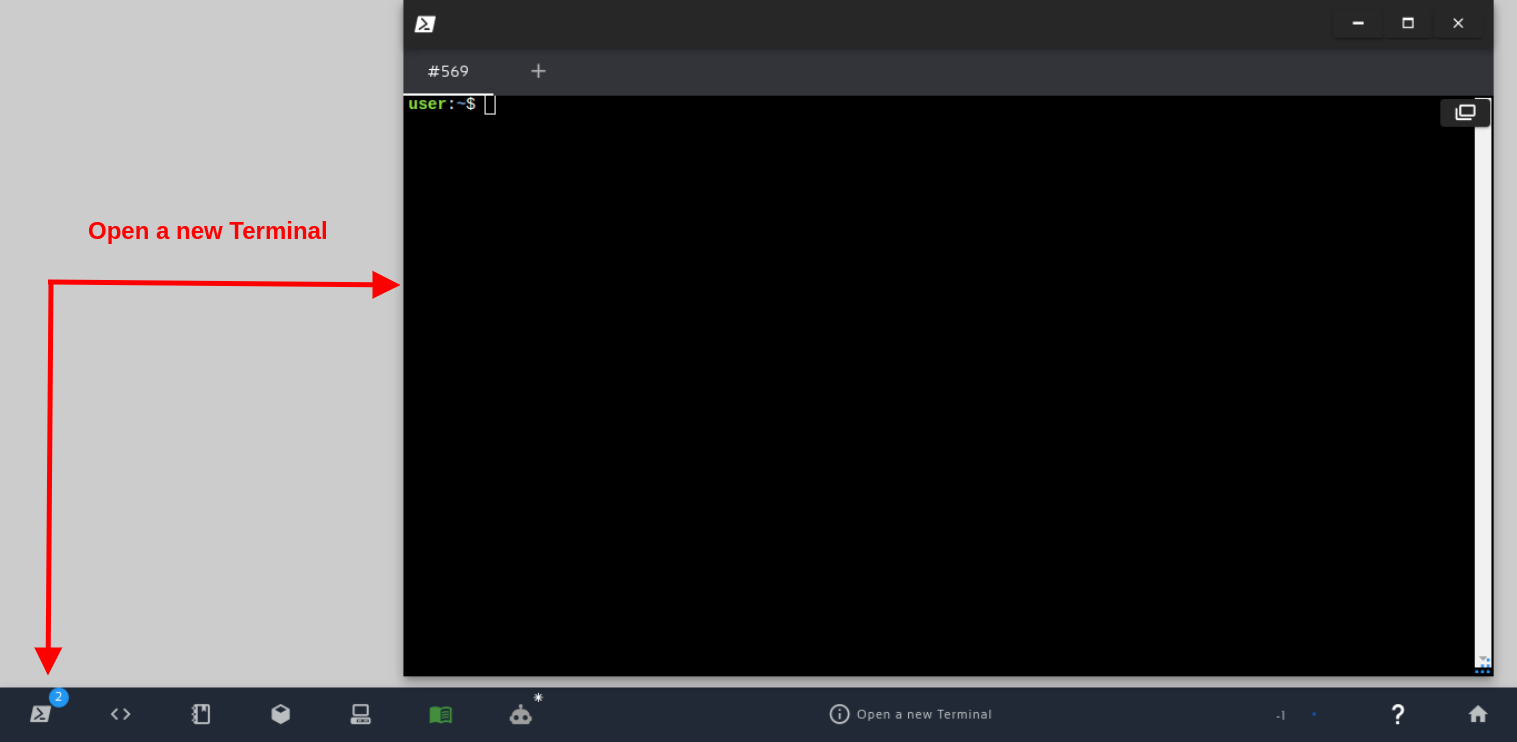
Open a new Terminal
Let’s take the chance and also open the Code Editor to be easier to modify our files:
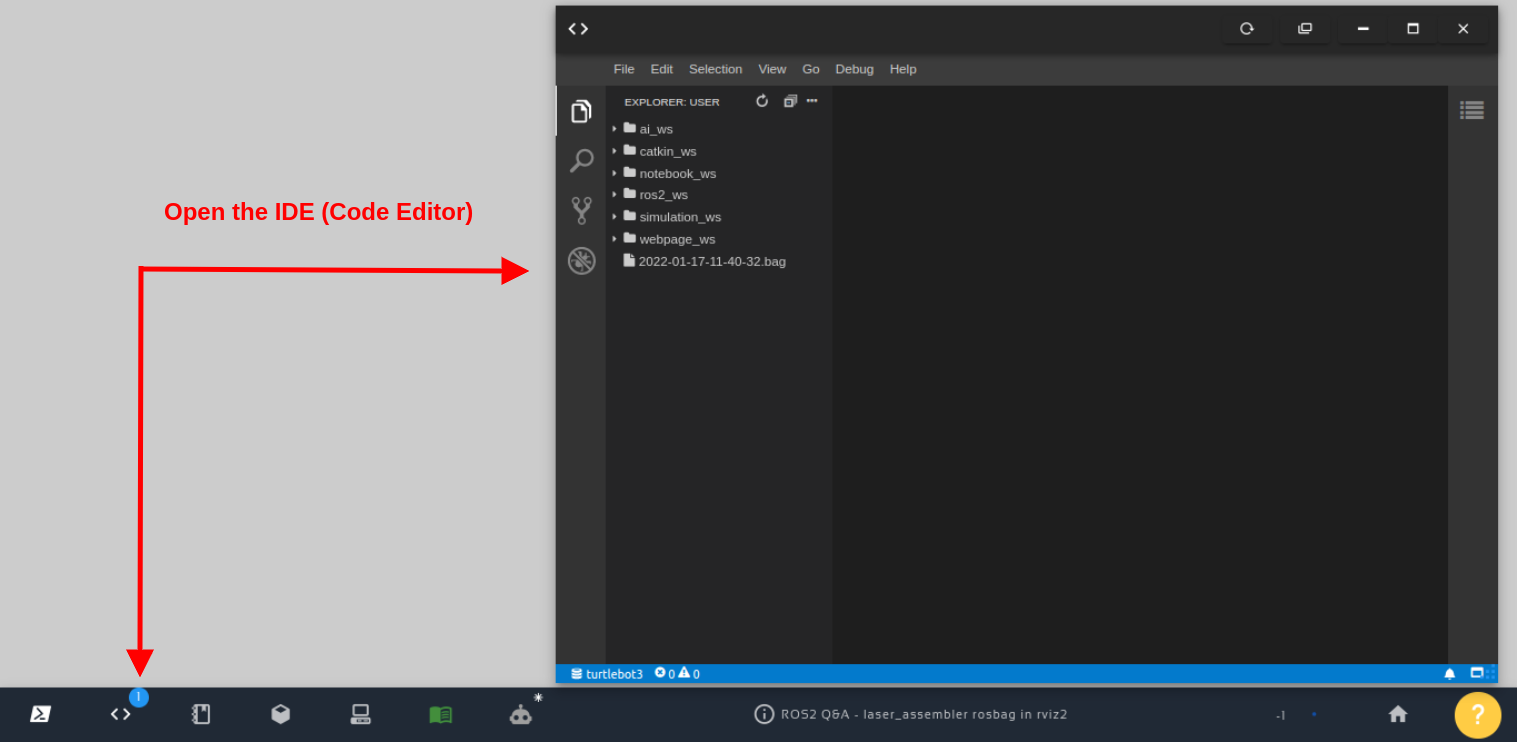
Open the IDE – Code Editor
Now, let’s go to the terminal and use apt to install bloom together with the python3-catkin-pkg modules.
sudo apt update

sudo apt install python3-bloom python3-catkin-pkg
The package should have been installed with no problems.
Let’s now move to the next step.
Creating a GIT access token to authenticate
Every time you interact with a remote Git repository on the command line (for example, doing a pull, or push operation), you are asked for your GitHub username and password. In this step, we create a Git Access Token to prevent Git from repeatedly prompting for your username and password during the release operation.
When filling out the form, set Note to a descriptive name such as Bloom, set Expiration to No expiration, and select the public_repo and workflow checkboxes.
This string is the token, copy it to your clipboard. Make sure to store it safely since you can’t display the token again in the GitHub interface.
In case you need more information on personal access tokens, please follow the link below:
Use the GIT access token to authenticate
Now that we have the Access Token, using the terminal, let’s create a folder named .config:
mkdir -pv ~/.config
Inside that folder, let’s create a file named boom:
cd ~/.config

touch bloom
Using the code editor, insert your GitHub username and PAT into it with the format shown below:
{
    "github_user": "<your-github-username>",
    "oauth_token": "<token-you-created-for-bloom>"
}
Since hidden files do not appear by default in the Code Editor, you have to click File Open in order to find the .config folder.
Please remember to save your ~/config/boom file by pressing CTRL+S (or File -> Save)
Congratulations. We are halfway through the release of a ROS2 Binary package. We hope this post was really helpful to you. The second post is coming soon. If you want a live version of this post, please check the video in the next section.
Youtube video
So this is the post for today. Remember that we have the live version of this post on YouTube. If you liked the content, please consider subscribing to our youtube channel. We are publishing new content ~every day.
Keep pushing your ROS Learning.
Related Courses & Training
If you want to learn more about ROS and ROS2, we recommend the following courses:
- ROS2 Basics in 5 Days (Python): https://app.theconstructsim.com/#/Course/73
- ROS2 Basics in 5 Days (C++): https://app.theconstructsim.com/#/Course/61
- ROS2 Basics in 5 Days Galactic (C++): https://app.theconstructsim.com/Course/117

0 Comments