

This is the 1st chapter of the series “Exploring ROS2 with a wheeled robot”
In this episode, you’ll learn how to subscribe to a ROS2 topic using ROS2 C++.
You’ll learn:
- How to create a node with ROS2 and C++
- How to subscribe to a topic with ROS2 and C++
- How to launch a ROS2 node using a launch file
1 – Setup environment – Launch simulation
Before anything else, make sure you have the rosject from the previous post, you can copy it from here.
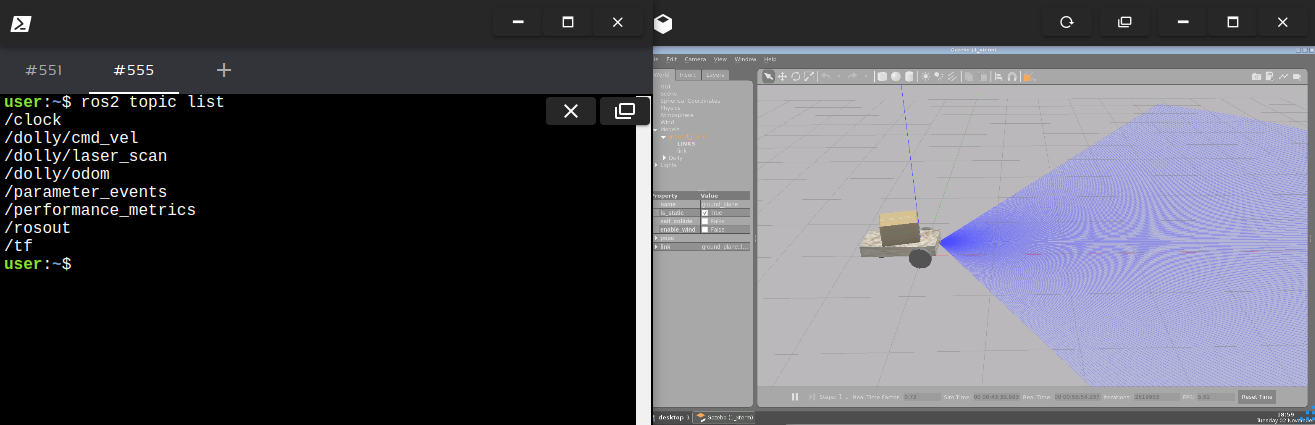
Launch the simulation in one webshell and in a different tab, checkout the topics we have available. You must get something similar to the image below:
2 – Create a ROS2 node
Our goal is to read the laser data, so create a new file called reading_laser.cpp:
touch ~/ros2_ws/src/my_package/reading_laser.cpp
And paste the content below:
#include "rclcpp/rclcpp.hpp"
#include "sensor_msgs/msg/laser_scan.hpp"

using std::placeholders::_1;

class ReadingLaser : public rclcpp::Node {

public:
  ReadingLaser() : Node("reading_laser") {

    auto default_qos = rclcpp::QoS(rclcpp::SystemDefaultsQoS());

    subscription_ = this->create_subscription(
        "laser_scan", default_qos,
        std::bind(&ReadingLaser::topic_callback, this, _1));
  }

private:
  void topic_callback(const sensor_msgs::msg::LaserScan::SharedPtr _msg) {
    RCLCPP_INFO(this->get_logger(), "I heard: '%f' '%f'", _msg->ranges[0],
                _msg->ranges[100]);
  }
  rclcpp::Subscription::SharedPtr subscription_;
};

int main(int argc, char *argv[]) {
  rclcpp::init(argc, argv);
  auto node = std::make_shared();
  RCLCPP_INFO(node->get_logger(), "Hello my friends");
  rclcpp::spin(node);
  rclcpp::shutdown();
  return 0;
}
We are creating a new class ReadingLaser that represents the node (it inherits rclcpp::Node). The most important about that class are the subscriber attribute and the method callback. In the main function we are initializing the node and keep it alive (spin) while its ROS connection is valid.
The subscriber constructor expects to get a QoS, that stands for the middleware used for the quality of service. You can have more information about it in the reference attached, but in this post we are just using the default QoS provided. Keep in mind the following parameters:
- topic name
- callback method
The callback method needs to be binded, which means it will not be execute at the subscriber declaration, but when the callback is called. So we pass the reference of the method and setup the this reference for the current object to be used as callback, afterall the method itself is a generic implementation of a class.
3 – Compile and run
In order to compile the cpp file, we must add some instructions to the ~/ros2_ws/src/my_package/src/CMakeLists.txt:
- Look for find dependencies and include the sensor_msgs library
- Just before the install instruction add the executable and target its dependencies
- Append another install instruction for the new executable we’ve just created
# find dependencies
find_package(ament_cmake REQUIRED)
find_package(rclcpp REQUIRED)
find_package(sensor_msgs REQUIRED)
...

...
add_executable(reading_laser src/reading_laser.cpp)
ament_target_dependencies(reading_laser rclcpp std_msgs sensor_msgs)
...

...
install(TARGETS
  reading_laser
  DESTINATION lib/${PROJECT_NAME}/
)
Compile it:
colcon build --symlink-install --packages-select my_package
4 – Run the node and mapping the topic
In order to run the executable created, you can use:
ros2 run my_package reading_laser
Although the the laser values won’t show up. That’s because we have a “hard coded” topic name laser_scan. No problem at all, when we can map topics using launch files. Create a new launch file ~/ros2_ws/src/my_package/launch/reading_laser.py:
from launch import LaunchDescription
from launch_ros.actions import Node

def generate_launch_description():

    reading_laser = Node(
        package='my_package',
        executable='reading_laser',
        output='screen',
        remappings=[
            ('laser_scan', '/dolly/laser_scan')
        ]
    )

    return LaunchDescription([
        reading_laser
    ])
In this launch file there is an instance of a node getting the executable as argument and it is setup the remappings attribute in order to remap from laser_scan to /dolly/laser_scan.
Run the same node using the launch file this time:
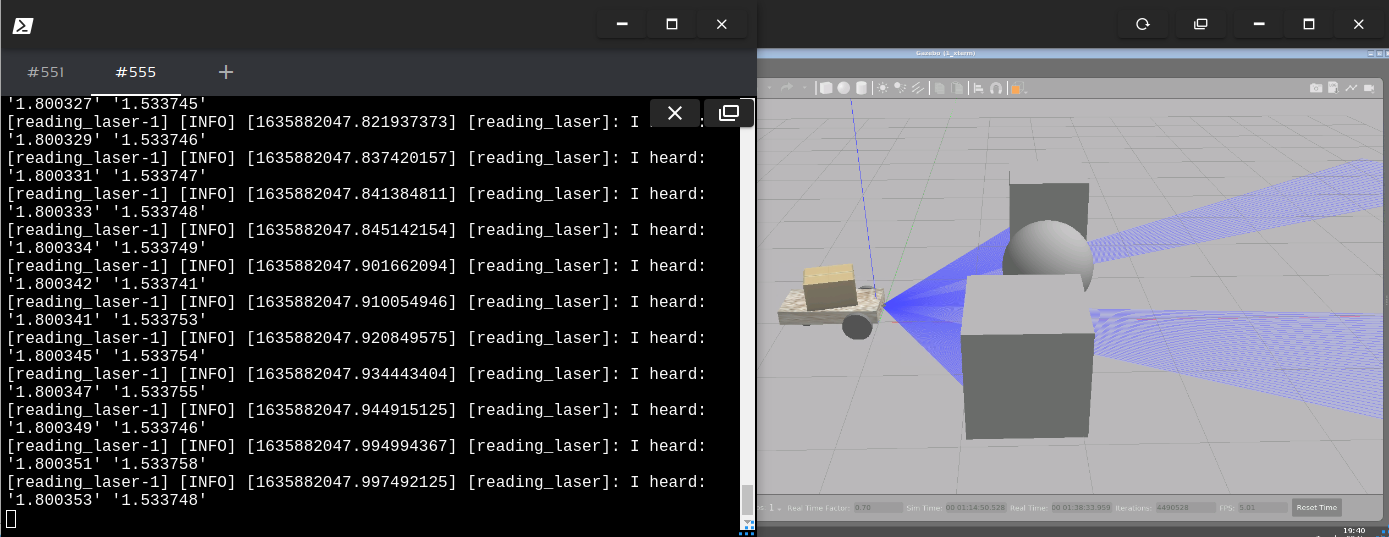
ros2 launch my_package reading_laser.launch.py
Add some obstacles to the world and the result must be similar to:


0 Comments