

In this video we are going to see how to write robot Poses into a file. This will allow you to keep track of the different positions that a mobile robot is in while it is moving.
▸ Get the code of the video by clicking on this link: https://goo.gl/DBdKoz
(You need an account on RDS. Once you click on the link, the whole code will appear on your RDS account ready to use)
Follow these steps to reproduce the project as shown in the video
Step 1
- Go to https://rds.theconstructsim.com/
- Create a new project. Choose a informative name and add some description in the description field. (for this tutorial we are using project name poses_to_file)
- Open the project. This will being you to the RDS environment with two menu options
ToolsandSimulations - Start an IDE by selecting
IDEoption from theTools. IDE is a very useful tool, it lets you navigate and edit files/directories. Try navigating around and verify that the directory layout of the project is as shown below:
    .
    ├── ai_ws
    ├── catkin_ws
    │   ├── build
    │   ├── devel
    │   └── src
    ├── notebook_ws
    │   ├── default.ipynb
    │   └── images
    └── simulation_ws
        ├── build
        ├── devel
        └── src
Note that we use simulation_ws directory to contain all files related to simulations.
Those files not related to simulations will go to catkin_ws (like python scripts, launch files etc)
Step 2
We will create a new catkin project inside the catkin_ws/src directory
$ cd catkin_ws/src catkin_create_pkg poses_to_file rospy
Next we will create a python script to write the poses to the file. We will create this script inside the newly created project.
$ cd poses_to_file/src touch poses_to_file.py
We have now created a empty script file named poses_to_file.py. We also need to make it executable. Use following commands to make it executable
$ chmod +x poses_to_file.py
Verify the permission by using the listing unix command
$ ls -l

Step 3
We will now write the program inside the python script.
The script contains class named SavePoses with following member functions
- __init__
- sub_callback
- write_to_file
+
The role of __init__ function would be to initialize a Pose type (_pose), a dictionary type (poses_dict) to hold Poses. We will subscribe to the /odom topic as well.
Function sub_callback is the callback for the subscriber we create in the __init__. Inside this callback function we receive the current pose and copy it inside variable _pose.
The function write_to_file is tasked with following:
- initializing dictionary keys pose1, pose2 and pose3
- open a file in write mode
- iterate through the keys of dictionary and write a formatted string containing values corresponding to the keys.
The complete code is as follows:
#! /usr/bin/env python

import rospy
from nav_msgs.msg import Odometry
from geometry_msgs.msg import Pose
import time


class SavePoses(object):
    def __init__(self):

        self._pose = Pose()
        self.poses_dict = {"pose1":self._pose, "pose2":self._pose, "pose3":self._pose}
        self._pose_sub = rospy.Subscriber('/odom', Odometry , self.sub_callback)
        self.write_to_file()

    def sub_callback(self, msg):

        self._pose = msg.pose.pose

    def write_to_file(self):

        time.sleep(5)
        self.poses_dict["pose1"] = self._pose
        rospy.loginfo("Written pose1")
        time.sleep(5)
        self.poses_dict["pose2"] = self._pose
        rospy.loginfo("Written pose2")
        time.sleep(5)
        self.poses_dict["pose3"] = self._pose
        rospy.loginfo("Written pose3")


        with open('poses.txt', 'w') as file:

            for key, value in self.poses_dict.iteritems():
                if value:
                    file.write(str(key) + ':\n----------\n' + str(value) + '\n===========\n')

        rospy.loginfo("Written all Poses to poses.txt file")


if __name__ == "__main__":
    rospy.init_node('spot_recorder', log_level=rospy.INFO)
    save_spots_object = SavePoses()
    #rospy.spin() # mantain the service open.
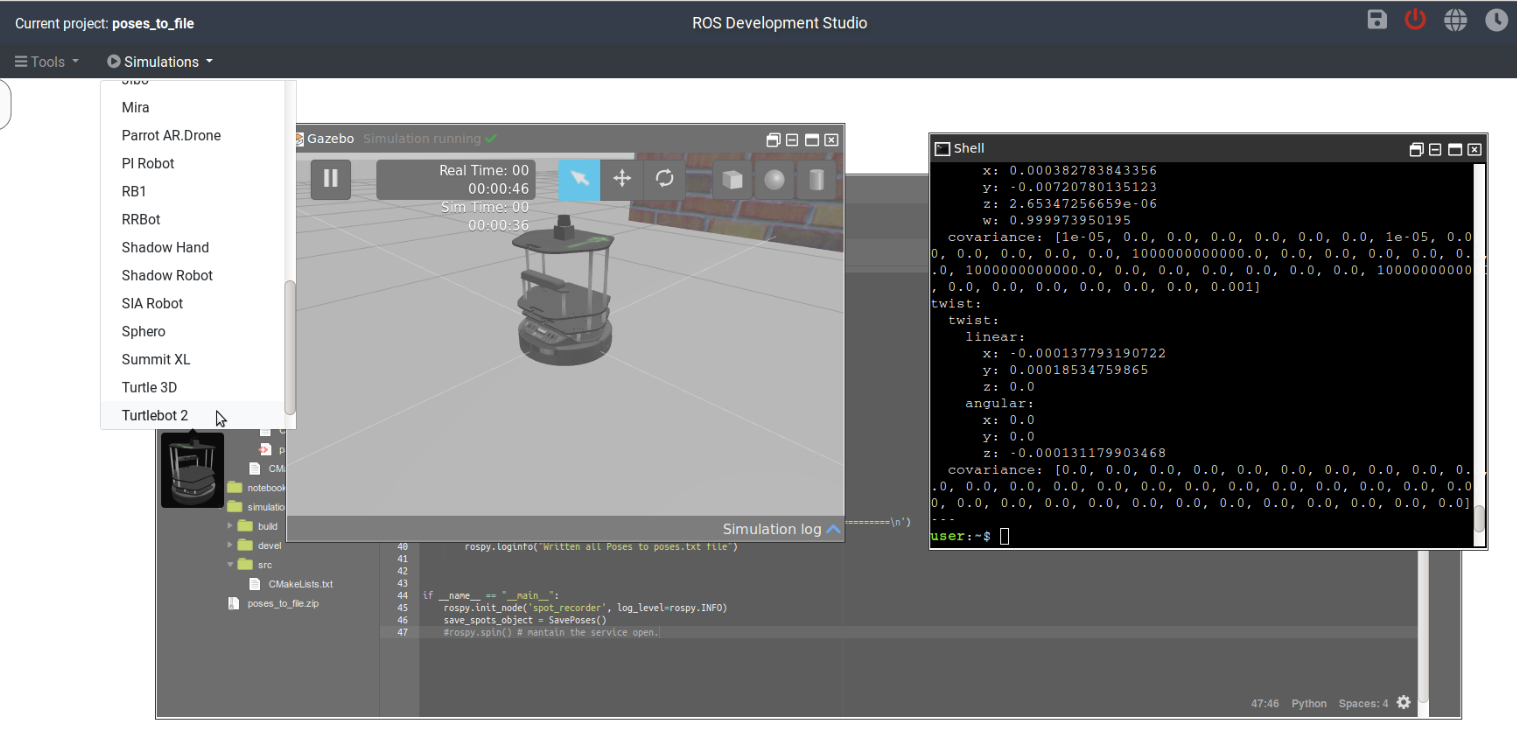
Before we run this script we need to start a simulation that will create a `/odom` topic. This topic will publish the odometry messages. Use the Simulations menu and select Turtlebot2 to start a simulation. Once the simulation is running you will see something like follows:
Now we can run the script with following command
$ rosrun poses_to_file poses_to_file.py
Let the script finish writing the poses to file. You will find a new file called poses.txt inside the src directory. This file will contain the poses as expected.
Thats about it. Enjoy learning ROS with Robot Ignite Academy.
// RELATED LINKS
▸ ROS Development Studio: https://goo.gl/Mx18Zn
▸ Robot Ignite Academy: https://goo.gl/XFkCpk
▸ ROS Navigation in 5 days online course: https://goo.gl/AV4hv4


Hello, if i want to print n poses, what should i do? Thank you!